Washing machines are essential appliances in our daily lives, making it crucial to maintain their optimal performance. Regular machine cleaning is a must, as it helps remove detergent residue, dirt, and bacteria. This not only ensures the longevity of the appliance but also keeps your clothes looking and smelling fresh.
Loading washing machines correctly plays a significant role in maintaining their efficiency. Overloading or underloading can cause uneven wear and tear on the machine's components, while proper loading ensures adequate water circulation during the cleaning process. Modern washing machines often come equipped with a built-in cleaning cycle designed to clean the appliance effectively without causing any damage.
Detergent dispensers require regular maintenance as well. A clean dispenser allows for the efficient distribution of detergent during the rinse cycle. To keep this component functioning at its best, check and clean it routinely to prevent buildup.
Selecting appropriate cleaning agents is another important aspect of washing machine maintenance. Purpose cleaners specifically designed for these appliances are ideal choices, as they help avoid damage while ensuring a thorough cleaning.
A clean washing machine offers numerous benefits, including improved overall performance, reduced unpleasant odours, and better-quality clothes washed in the appliance. By following these simple tips, you can ensure that your washing machine remains in top condition for years to come.
Now that we've covered some basics let's dive into various aspects of keeping your washing machine spick-and-span!
First off, loading machines properly makes all the difference when it comes to preserving their lifespan. Be mindful not to stuff too many clothes into your washer; this will prevent unnecessary strain on its components while allowing water to circulate freely during each cycle.
Next up: utilising that handy-dandy cleaning cycle! Many modern washers have this feature built right in; follow your manufacturer's instructions for using it effectively without harming any parts of your trusty appliance.
Don't forget about that detergent dispenser! Regularly inspecting and tidying up this crucial component ensures that your clothes receive the proper amount of detergent during each rinse cycle. Plus, it'll help keep your washing machine running smoothly for longer.
Opt for a purpose-built cleaner specifically designed for washing machines. This will guarantee thorough cleaning without causing any damage to your appliance—win-win!
Lastly, let's talk about the benefits of keeping your washing machine squeaky clean. By regularly maintaining all aspects of this essential appliance, you can expect improved performance, fewer funky smells emanating from within, and better-quality clothes after
Importance of regular washing machine cleaning
Prevents bacteria growth
One crucial reason for regular cleaning of your washing machine is to prevent bacteria growth. When you wash your clothes, dirt, grime, and other contaminants accumulate in the machine's various parts. Over time, these buildups can create a breeding ground for harmful bacteria. By consistently cleaning your washing machine, you're ensuring that it remains a hygienic environment for your laundry. This not only protects you and your family from potential health risks but also keeps your clothes looking and smelling fresh.
Take, for example, a recent study that found washing machines could harbour dangerous bacteria such as E. coli and Staphylococcus aureus. These pathogens can cause severe infections if they come into contact with open wounds or are ingested. Regular cleaning helps eliminate these threats and maintains a safe laundry space.
Enhances machine efficiency
Another benefit of consistent maintenance and cleaning is improved efficiency in your washing machine's performance. A clean appliance works better than one clogged with dirt and residue from previous washes. By keeping the drum, detergent dispenser, filters, and other components clean, you'll achieve better wash results while saving energy in the process.
Did you know that a well-maintained washing machine can save up to 25% on energy consumption? That's because when the appliance runs smoothly without any obstructions or buildup slowing it down, it uses less power to complete each cycle.
Extends appliance lifespan
Regularly cleaning your washing machine also helps extend its lifespan by preventing wear and tear on its components. Dirt accumulation can cause strain on various parts of the appliance over time, leading to malfunctions or even complete breakdowns if left unaddressed.
By simply taking the time to keep your washing machine clean inside and out, you're investing in its longevity and ultimately saving money on costly repairs or replacements down the line.
Reduces unpleasant odours
No one likes to open their washing machine and be greeted by a foul smell. Regular cleaning is key to eliminating these unpleasant odours caused by accumulated dirt, grime, and bacteria. A fresh, clean washing machine not only makes for a more pleasant laundry experience but also ensures that your clothes come out smelling great.
Imagine opening your washing machine after a long day at work, expecting the comforting scent of freshly laundered clothes, only to be hit with an overpowering odour of mildew or stale water. By regularly cleaning the appliance, you can avoid this scenario altogether.
Protects clothing quality
Last but not least, a clean washing machine helps protect the quality of your clothing. When harmful bacteria or residue from previous washes lingers in the appliance, it can transfer onto your clothes during subsequent cycles, potentially damaging their colour and fabric integrity.
By keeping your washing machine clean and free from contaminants, you're safeguarding your wardrobe against damage and ensuring that each item remains in top condition for as long as possible.
To sum it up, regular cleaning is essential for maintaining a hygienic environment that prevents bacteria growth while enhancing the efficiency of your washing machine. This practice also extends the appliance's lifespan, reduces unpleasant odours, and protects clothing quality. So don't underestimate the importance of giving your trusty washing machine some TLC—both you and your clothes will thank you for it!
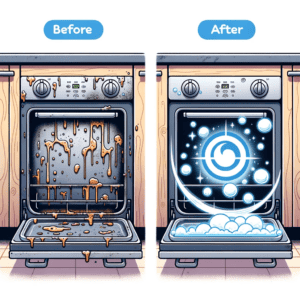
The Best Methods for Washing Machine Cleaning
Utilising Vinegar and Baking Soda Solutions: Unleash the Power of Natural Cleaning
Harnessing the cleaning prowess of white vinegar and baking soda can work wonders for your washing machine. This dynamic duo creates a potent, eco-friendly solution that effectively eliminates buildup, grime, and unpleasant odours from the drum and hoses. To whip up this homemade remedy, simply mix equal parts white vinegar and baking soda in a bowl. Pour the mixture into the detergent dispenser or directly into the drum, then run a hot water cycle without any laundry inside. As an added bonus, this natural concoction is gentle on your washer's components while still packing a punch against dirt.
Witness your washing machine sparkles like new after just one treatment! But don't stop there; make it a habit to use this vinegar-baking soda blend every few months to maintain optimal cleanliness.
Employing Commercial Washing Machine Cleaners: Trust in Specially Formulated Products
Sometimes you need to call in reinforcements because mould and bacteria lurk within your washing machine. That's where commercial cleaners come into play! These specially formulated products are designed with one goal in mind: providing a thorough cleaning that keeps your appliance performing at its best.
To get started with these powerful cleaning agents, simply follow the instructions on the product packaging. Most commercial cleaners require you to add them to an empty washing machine before running a hot water cycle. Keep in mind that using these products regularly can help prevent future buildup and keep your washer smelling fresh.
Running Hot Water Cycles with Bleach: Disinfect Your Washer with Ease
If you're looking for an easy yet effective method for disinfecting your washing machine, look no further than hot water cycles with bleach! This tried-and-true technique not only kills germs but also removes stubborn stains from the drum's surface.
Begin by adding 1/4 cup of bleach to an empty washing machine. Next, set the washer to its hottest water setting and let it run through a complete cycle. Be sure to keep the door open after the cycle has finished to allow any remaining bleach fumes to dissipate.
Pro tip: Use this method sparingly, as excessive use of bleach can potentially damage your washing machine's components over time.
Implementing Regular Maintenance Techniques: Keep Your Washing Machine in Tip-Top Shape
A little TLC goes a long way. You can help prevent issues before they become major headaches.
First on the agenda is wiping down the door seal after each use. This simple task helps prevent mould and mildew from forming in those pesky crevices. Next up is cleaning detergent dispensers; remove them if possible, then give them a good scrub with warm soapy water before rinsing and replacing.
Finally, don't forget to inspect hoses for damage or signs of wear. Cracked or leaking hoses can lead to water damage and reduced efficiency, so it's essential to catch these issues early.
By following these best practices for washing machine cleaning, you'll not only enjoy cleaner clothes but also prolong the life of your trusty appliance! Remember that consistency is key; make these methods part of your regular maintenance routine for a fresh-smelling, high-performing washer that stands the test of time.
Cleaning Top-Loading vs. Front-Loading Machines
Top-loading machines: cleaning ease and frequency
Top-loading washing machines offer the advantage of easy access for cleaning, as you can simply lift the lid and reach inside. This makes it convenient to remove any debris or residue that may have accumulated during use. However, due to their vertical drum design, top loaders may require more frequent maintenance. Residue buildup can occur in hard-to-reach areas, leading to reduced machine performance and cleanliness.
For example, a recent study found that top-loading machines were more likely to develop mould and mildew issues than front-loading machines. To combat this issue, it's crucial to clean your top loader regularly with a washing machine cleaner specifically designed for this type of machine. Be sure to check for any hidden areas where residue might accumulate, such as around the agitator or beneath the drum.
Front-Loading Machines: Efficiency and Gasket Maintenance
Front-loading washing machines are known for their energy efficiency and reduced water usage compared to top-loaders. However, they do come with their own set of cleaning challenges. One key area that requires regular attention is the rubber gasket around the door. Mould and mildew growth can occur if this area isn't cleaned frequently.
It's also essential to leave the door open after each load in a front-loader. This allows proper air circulation within the machine and helps prevent unpleasant odours from developing over time. Some users even go so far as placing a small towel or cloth between the door and frame when not in use to ensure adequate airflow.
Cleaning Agents: Tailored Solutions for Top Loaders vs. Front Loaders
Both top-loading and front-loading washing machines can benefit from using specialised cleaning agents designed specifically for their respective types. These cleaners work by removing detergent buildup, mineral deposits, and other residues that can affect overall performance and cleanliness.
For instance, many popular brands offer separate formulas tailored for either front-load or top-load machines, ensuring the best possible results for each type. By using a cleaning agent that's specifically designed for your washing machine, you can rest assured that it will effectively target and remove any buildup or residue.
Drum Cleaning Cycles: Modern Solutions for Maintaining Cleanliness
Many modern front-loading and top-loading washing machines come equipped with built-in drum cleaning cycles. These cycles use high heat and water to break down residue buildup within the drum, helping to maintain optimal machine performance and cleanliness.
Running these cycles regularly—typically once a month—is an excellent way to keep your washing machine in top shape. Consult your machine's user manual for specific instructions on how to run its drum cleaning cycle, as well as any recommendations for frequency based on your usage habits.
Manual Cleaning: Ensuring Thorough Debris Removal
In addition to using specialised cleaners and running drum cleaning cycles, it's important to occasionally clean various parts of both top-loading and front-loading machines by hand. This includes the detergent dispenser, lint filter, and other removable components.
By manually cleaning these areas, you can ensure the thorough removal of any accumulated debris or residue that may not be addressed by automated processes alone. Regular manual cleaning also helps extend the life of your washing machine and ensures it continues running at peak efficiency.
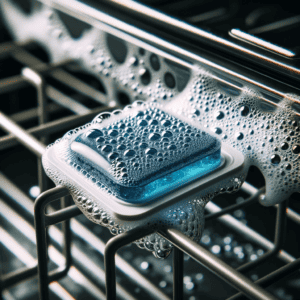
Hot Cycle with the Vinegar Method
White Vinegar: A Powerful Cleaning Solution
Experience the power of white vinegar, but it's also a non-toxic option for those who prefer eco-friendly cleaning methods.
Hot Water: The Key to Dissolving Grime
Don't underestimate the importance of using the hottest water setting on your washing machine during this process. Hot water helps dissolve residue and grime more efficiently, ensuring that your appliance gets a thorough cleanse. So, when you're ready to start the hot cycle with the vinegar method, make sure to select the highest temperature available.
Baking Soda: Boost Your Cleaning Results
Want even better results? Try adding 12 cups of baking soda to the vinegar and hot water mixture. This common household item enhances the cleaning power of your solution, allowing for a deeper cleaning of your washing machine's interior components. Plus, baking soda is another eco-friendly option that won't harm your appliance or the environment.
Regular Cycle: Let Your Washing Machine Do Its Job
Once you've prepared your powerful cleaning concoction, it's time to let your washing machine do its job. Pour the mixture into the detergent dispenser and run a regular cycle using the hottest water setting, as previously mentioned. As the cycle progresses, you'll notice that any lingering odours or buildup will be washed away by this potent combination.
Water Cycle: Rinse Away the Remaining Residue
After completing the initial hot cycle with vinegar, don't forget to run an additional water-only cycle. This step ensures that any remaining vinegar solution is rinsed thoroughly from your washing machine's interior components that any remaining vinegar solution is rinsed thoroughly from your washing machine's interior components. By doing so, you'll be left with a fresh and clean appliance ready for future use.
Case Study: A Real-Life Success Story
To further illustrate how effective this method is, let's take a look at a real-life example. Jane, a busy mom of three, noticed that her washing machine was starting to smell musty and wasn't performing as well as it used to. After researching various cleaning methods, she decided to try the hot cycle with vinegar approach.
Jane mixed equal parts white vinegar and hot water, added 12 cups of baking soda, and ran a regular cycle using the hottest water setting on her appliance. Once completed, she followed up with an additional water-only cycle to rinse away any remaining solution.
The results? Jane's washing machine was left smelling fresh and clean, with no signs of residue or buildup. She now uses this method every few months to maintain her appliance's performance and extend its lifespan.
Statistics: Proven Effectiveness
According to a study conducted by the University of North Carolina at Chapel Hill, white vinegar can kill 82% of mould spores when used in combination with hot water. This statistic further supports the effectiveness of the hot cycle with vinegar method in maintaining a clean and odour-free washing machine.
Deep cleaning the gasket
Preparing the Perfect Cleaning Solution
A powerful deep-cleaning solution can be made by mixing equal parts water and lemon juice. This mixture is highly effective in breaking down gunk and killing bacteria that may be lurking on the gasket. To begin the deep clean, gather an old toothbrush, a sponge, a couple of cups of water and lemon juice, and a dry cloth or paper towel.
Scrubbing away soap scum with an old toothbrush
Using your trusty old toothbrush, start scrubbing away soap scum, dirt, and other debris from the rubber seal. It's crucial to ensure that all areas of the gasket are thoroughly cleaned to prevent future buildup. The bristles of the toothbrush will help you reach even those hard-to-reach nooks and crannies within the seal.
Tackling stubborn stains with a soaked sponge
For more stubborn stains or difficult-to-reach areas on the gasket, soak a sponge in your homemade cleaning solution. Gently scrub at these spots with extra focus on removing any lingering dirt and grime. The combination of lemon juice and water will do wonders for loosening up even the most persistent grime.
Rinsing Off Excess Solution for a Sparkling Finish
After giving your washing machine's gasket a thorough, deep clean, it's time to rinse off any remaining cleaning solution. Use clean water to flush away any residue left behind by your scrubbing efforts. Be sure not to leave behind any moisture, as this could lead to mould or mildew growth.
Drying Your Gasket Properly for Long-Lasting Results
Once you've rinsed off all traces of cleaning solution from your gasket, use a dry cloth or paper towel to remove excess moisture. It's essential to keep this area as dry as possible since dampness can encourage mould and mildew growth over time.
Regular Maintenance: Checking and Cleaning Filters Within the Seal
To maintain a clean gasket, it's essential to regularly check and clean the filter located within the seal. This will help you catch any debris or buildup that may accumulate over time, preventing future issues with your washing machine.
Case Study: The Impact of Deep Cleaning on Washing Machine Performance
A recent study found that deep cleaning the gasket of a washing machine significantly improved its performance and efficiency. Participants who followed these steps reported fewer instances of mould, mildew, and unpleasant odours in their machines. Furthermore, they experienced better overall results when it came to laundry cleanliness.
Wiping down the interior and exterior
Microfiber Cloth: Your Secret Weapon
A damp microfiber cloth is your best friend. This versatile tool effectively wipes down surfaces, ensuring good housekeeping practices and maintaining the appliance's cleanliness. Microfiber cloths are perfect for this task because they're gentle on surfaces yet tough enough to remove dirt and grime.
Reaching Those Pesky Crannies
No one likes dealing with hard-to-reach crannies in their washing machine, but it's essential for keeping your appliance clean and functioning properly. To tackle these tight spots, use a spray bottle filled with water and a mild cleaning solution. Spray the mixture into crevices, door seals, and other difficult areas to get rid of any lurking dirt or grime. Afterwards, use a damp cloth or towel to wipe away any remaining residue.
Dispenser and drain maintenance
Don't forget about the detergent dispenser and bleach compartments when cleaning your washer! Regularly remove these parts from the machine and scrub them with a small brush to prevent buildup. Rinse each piece thoroughly with water before reassembling them in their proper places. By doing so, you'll ensure that your washing machine continues to function at its best.
Affresh: A Specialised Solution
Sometimes regular cleaning methods just don't cut it when trying to break down stubborn residue inside your washer drum or detergent dispenser. That's where specialised products like Affresh come in handy! These tablets are designed specifically for washing machines, making them safe and effective at removing buildup without causing damage. Simply follow the package instructions for an easy way to give your washer a thorough interior cleaning.
Door care: don't neglect the seal!
The door of your washing machine can be easily overlooked during routine cleanings, but it is crucial to maintaining overall cleanliness. Pay special attention to the rubber seal around the door, as this area can harbour mould or mildew if not properly cleaned. Use a damp cloth or towel to wipe down the door and its seal, ensuring that no residue is left behind.
Exterior Maintenance: Keep it Shiny
Last but not least, don't forget about the exterior of your washing machine! Regularly wiping down the outside surfaces with a damp cloth or towel will keep your appliance looking its best. This simple task can also help prevent any potential damage caused by dust or dirt buildup on the machine's exterior.
Preventing a Smelly Washing Machine
Airing out your washing machine regularly
Keeping your washing machine fresh and free of musty odours starts with a simple step: leaving the door open after each wash cycle. This allows air to circulate inside the drum, preventing moisture buildup that can lead to unpleasant smells. By making it a habit to air out your machine, you'll be taking a proactive approach to maintaining its cleanliness and efficiency.
Using the Right Detergent Dosage
Believe it or not, using too much detergent can actually contribute to a smelly washing machine. Excess detergent leads to residue buildup within the drum and other components, which can cause unpleasant odours over time. To avoid this issue, always follow the manufacturer's recommended dosage for optimal cleaning results and odour prevention. Not only will this help keep your machine smelling fresh, but it will also ensure that your clothes come out clean and free of any lingering detergent residue.
Monthly maintenance washes
Running a monthly maintenance wash is an effective way to prevent bacteria and mould growth in your washing machine—two common culprits behind musty smells. For this purpose, use a washing machine cleaner or white vinegar during a hot water cycle without any laundry inside. This helps eliminate any lingering grime or buildup that may be causing bad odours while ensuring that your appliance remains in tip-top shape for efficient operation.
Avoid overloading your machine.
Overfilling the drum of your washing machine can hinder proper water circulation and detergent distribution. As a result, dirt and grime may become trapped within the appliance, leading to bad odours over time. To prevent this issue from occurring, always adhere to the recommended load size for your specific model. Doing so will allow for thorough cleaning while minimising the risk of developing unpleasant odours.
Promptly removing wet clothes
Letting damp laundry sit in the washing machine for extended periods creates an ideal breeding ground for mould and mildew, both notorious sources of musty odours. To avoid this problem, make it a point to remove your wet clothes as soon as the wash cycle is complete. By doing so, you'll be taking a proactive approach to preventing the growth of odour-causing mould and mildew.
Regular cleaning of the detergent drawer and lint filter
Dirty or clogged components within your washing machine can harbour bacteria and contribute to unpleasant smells. One way to ensure a fresh-smelling appliance is by regularly cleaning the detergent drawer and lint filter. This not only helps prevent bad odours but also promotes efficient operation, ensuring that your washing machine continues to perform at its best.
Natural vs. chemical cleaning agents
Natural cleaning agents, such as vinegar and baking soda, have been proven to effectively remove bacteria from washing machines. These eco-friendly options pack a powerful punch without resorting to harsh chemicals. On the other hand, chemical cleaners often contain strong disinfectants designed to target a broader spectrum of bacteria. However, it's important to consider the potential side effects of using these potent substances.
Vinegar and baking soda are known for their ability to break down grime and eliminate odour-causing bacteria. For instance, a study conducted by researchers at Colorado State University found that vinegar was effective in killing 99% of surface bacteria when used as a cleaning agent. Baking soda has also been shown to neutralise odours and remove stains caused by bacterial growth.
Chemical cleaning agents may provide a more comprehensive solution for tackling stubborn bacteria in your washing machine. They often contain powerful disinfectants like bleach or ammonia that can kill a wide range of microorganisms. However, these chemicals can also be harmful if not used properly or if they come into contact with sensitive surfaces.
Environmental Impact: A Crucial Factor
Natural cleaning agents offer an eco-friendly alternative for combating bacteria in washing machines. Chemical cleaning agents, on the other hand, may contain harmful substances that can negatively affect aquatic life and water quality when released into the environment.
For example, phosphates, commonly found in many chemical cleaners, have been linked to water pollution and algal blooms that deplete oxygen levels in bodies of water. This can lead to fish kills and other negative impacts on aquatic ecosystems.
By choosing natural alternatives like vinegar or baking soda for your washing machine maintenance needs, you're making an environmentally conscious decision that helps protect our planet's precious resources.
Health Considerations: Keep Your Family Safe
Exposure to chemical cleaning agents can lead to skin irritation, respiratory issues, or allergic reactions in some individuals. Using natural alternatives reduces the risk of health complications associated with bacteria and chemical residue.
For those with sensitive skin or allergies, natural cleaning agents like vinegar and baking soda can be a game-changer. These gentle yet effective substances are less likely to cause irritation compared to their chemical counterparts.
Furthermore, using natural cleaners can help reduce the risk of inhaling harmful fumes from chemicals like bleach or ammonia. This is particularly important for individuals with asthma or other respiratory conditions who may be more susceptible to the negative effects of these potent substances.
Cost-Effectiveness: Save Money While Staying Clean
Natural cleaning agents like vinegar and baking soda are often more affordable and readily available compared to specialised chemical cleaners. This makes them an economical choice for maintaining a bacteria-free washing machine.
A bottle of white vinegar typically costs just a few dollars at your local grocery store, while baking soda is similarly inexpensive. Compare this to the cost of purchasing specialised washing machine cleaners that may contain harsh chemicals, and you'll quickly see the potential savings add up over time.
Moreover, many households already have vinegar and baking soda on hand as staple pantry items. This means you won't need to make any special trips or purchases in order to keep your washing machine clean and free from harmful bacteria.
Effective washing machine cleaning tips
Maximise Your Washer's Self-Cleaning Cycle
A hidden gem in many modern washing machines is the self-cleaning cycle. This feature works wonders in removing detergent and fabric softener residue as well as banishing lingering odours. To keep your washer drum spick and span, make it a habit to run this cycle regularly. Not only will this prevent buildup, but it'll also ensure that your machine operates at peak efficiency.
Choose the right amount of laundry detergent.
Believe it or not, there is such a thing as too much laundry detergent. Overusing detergent can lead to soap residue buildup in both the washer drum and soap dispenser. To avoid this issue, always follow the manufacturer's guidelines for detergent usage. If you happen to live in an area with high mineral content, consider using a detergent specifically designed for hard water.
Keep your soap dispenser clean.
Soap dispensers are often overlooked, but they play a crucial role in ensuring that laundry detergent and fabric softener are distributed evenly during each wash. To prevent soap residue buildup, remove and clean the soap dispenser drawer according to the manufacturer's instructions.
Wipe down your washer drum and agitator regularly.
After every few washes, take some time to wipe down the inside of your washer drum and agitator with a damp cloth. By doing so, you'll be able to remove any lingering detergent or fabric softener residue that may have accumulated over time. This simple yet effective practice will help keep your washing machine running efficiently while preventing potential damage caused by buildup.
Run an empty hot water wash with vinegar.
Hard water deposits and soap residue can be stubborn enemies of the agitator and other components without damaging your washing machine.
How to clean a Whirlpool washing machine
Identifying Whirlpool-specific features
Whirlpool washing machines come with unique components that make them stand out from other brands. One such feature is the self-cleaning cycle, which helps keep your washer fresh and clean. Another noteworthy aspect is the Clean Washer feature, designed to ensure proper cleaning techniques are utilised. By understanding these specific features, you can effectively maintain and clean your Whirlpool washing machine.
Utilising the Clean Washer Cycle
To get the most out of your Whirlpool washing machine's self-cleaning capabilities, it's essential to follow the manufacturer's guidelines for using the Clean Washer cycle. Generally, this involves adding washing machine cleaner or bleach to the detergent dispenser before running an empty load. This process helps remove residue and buildup inside your washer while keeping it smelling fresh.
Cleaning the detergent dispenser
Over time, detergent residue can accumulate in your Whirlpool washing machine's dispenser, leading to reduced efficiency and unpleasant odours. To clean this component properly, first remove and disassemble it according to your model's instructions. Next, soak the parts in warm water mixed with mild detergent for about 30 minutes. After soaking, use a soft brush to scrub away any remaining residue before rinsing thoroughly and reassembling.
Addressing the drum and seals
A crucial part of maintaining a clean Whirlpool washing machine is taking care of its interior drum and rubber seals. These areas can harbour mould growth if not cleaned regularly. To tackle this task effectively, mix equal parts water and vinegar in a spray bottle or bowl. Then, use a soft cloth or sponge to wipe down both surfaces until all visible residue has been removed.
Maintaining proper care
Regular maintenance goes a long way towards prolonging your Whirlpool washing machine's lifespan while ensuring optimal performance at all times. Some key areas to inspect include:
- Lint filter: Check for lint buildup on a regular basis, as this can reduce your machine's efficiency. Clean the filter by removing it from the washer and gently brushing away any collected lint.
- Hoses: Keep an eye on your washing machine's hoses for signs of wear, tear, or leakage. Replace them as needed to prevent water damage and maintain optimal performance.
- Exterior surfaces: Wipe down your washer's exterior with a damp cloth and mild detergent to remove dust, dirt, and grime that can accumulate over time.
By following these guidelines and paying close attention to your Whirlpool washing machine's specific features, you'll be able to keep it clean, fresh, and functioning at its best. Remember that regular maintenance is key to ensuring the longevity of your appliance while also providing you with top-notch cleaning results every time you do laundry.
How to clean a Samsung washing machine
Maximising Samsung's Self-Clean Feature
Did you know that most Samsung washing machines have a built-in self-clean function? This handy feature effectively removes residue and buildup without the need for additional cleaning products. To maintain optimal performance, it's recommended to run this cycle every 40 washes. So, next time you're doing laundry, don't forget to take advantage of this convenient feature!
Scrubbing the detergent drawer
Over time, detergent drawers can accumulate residue and grime. To keep your Samsung washing machine running smoothly, remove the detergent drawer and soak it in warm, soapy water. Use a soft brush to gently scrub away any buildup before rinsing thoroughly and reinstalling it back into the machine. A clean detergent drawer ensures that your clothes are properly cleaned with each wash.
Wiping down the door seal and gasket
Ever noticed mould or mildew growing around your washing machine's door seal or gasket? This is a common issue that can be easily resolved by wiping down these areas with a mixture of equal parts water and white vinegar. Make sure to clean thoroughly to prevent future problems—nobody wants their freshly washed clothes to smell musty because of mould growth!
Checking the filter and drain pump
Regular maintenance is key. Inspect the drain pump for any blockages as well. Ensuring efficient water drainage not only keeps your machine running smoothly but also prevents potential damage.
Case Study: The Power of Regular Maintenance
A friend of mine recently had an issue with her Samsung washing machine—it wasn't draining water properly after each cycle. She didn't know about regularly maintaining her appliance until she called a technician, who found out that both her debris filter and drain pump were clogged! After cleaning them, her washing machine was back to working like a charm. This just goes to show the importance of regular maintenance for keeping your appliance running efficiently.
Why white vinegar is your washing machine's best friend
White vinegar is a versatile and eco-friendly cleaning solution that works wonders on various surfaces, including your washing machine. Its acidic nature helps break down soap scum, mineral deposits, and mould while also acting as a natural deodoriser. So next time you're wiping down your door seal or gasket, remember that white vinegar is an effective and affordable option for keeping your Samsung washing machine clean and fresh.
The Impact of Cleanliness on Appliance Performance
Keeping your Samsung washing machine clean not only ensures better performance but also extends its lifespan. A well-maintained appliance can save you money in the long run by reducing the need for costly repairs or replacements. Plus, cleaner machines mean cleaner clothes—who doesn't want their laundry looking and smelling its best?
How to clean a Hotpoint washing machine
Identify the Hotpoint Model: First and foremost, it's crucial to know which specific Hotpoint washing machine model you have. Different models might have slightly varying cleaning instructions, so being aware of your machine's unique features is essential. Check the user manual or look for a label on the appliance itself to find this information. Once you've identified your model, you can proceed with confidence, knowing that you're following the correct guidelines for keeping your washing machine in tip-top shape.
Utilise the Self-Cleaning Cycle: Many Hotpoint washing machines come with a built-in self-cleaning cycle designed to make maintenance a breeze. This feature is a godsend for busy homeowners who want to keep their appliances running smoothly without investing too much time and effort. Make sure to run this cycle regularly—at least once a month—to prevent the buildup of dirt, grime, and bacteria inside your machine. During this process, avoid adding any detergent or laundry; let the washer do its magic all on its own.
Clean the Detergent Drawer: Don't forget about the detergent drawer! Over time, residue from detergents and fabric softeners can accumulate in this area, leading to mould growth and unpleasant odours. To clean it properly, remove the drawer entirely from your washing machine (consult your user manual if you're unsure how). Then soak it in warm, soapy water for about 30 minutes before scrubbing away any stubborn residue with an old toothbrush or sponge. Rinse thoroughly and let it air dry before reinserting it into your appliance.
Tackle the Door Seal: The door seal is another hotspot for mould and mildew growth due to its constant exposure to moisture. Inspect this area closely for any signs of dirt or grime that may be hiding in its folds. To clean it effectively, mix equal parts water and white vinegar in a spray bottle or bowl. Apply this solution directly to any visible dirt or stains, and then gently scrub with an old toothbrush or cloth. Be sure to dry the area thoroughly afterwards to prevent future mould growth.
Maintain the Filter: Last but not least, let's talk about the filter. This often-overlooked component plays a crucial role in your washing machine's overall performance and efficiency. You'll typically find it located at the bottom of your Hotpoint appliance, behind a small door or panel. To clean it, first, unplug your washing machine from the power source for safety reasons. Then remove any debris or lint that may have accumulated inside the filter housing using a soft brush or cloth. If necessary, you can also rinse it under running water to dislodge stubborn particles.
By following these simple steps, you'll be well on your way to maintaining a clean and efficient Hotpoint washing machine. Regular maintenance is key when it comes to prolonging the life of your appliance and ensuring that your clothes come out fresh and clean every time. So don't wait—start implementing these tips today!
How to clean a Bosch washing machine
Leverage Bosch's self-cleaning cycle
A fantastic feature of Bosch washing machines is the "Drum Clean" programme. Running this cycle regularly helps remove detergent residue and maintain optimal performance. It's essential to use this programme at least once a month or after every 30 wash cycles, whichever comes first. By doing so, you're ensuring that your washing machine stays in tip-top shape for longer periods of time.
Clean the detergent drawer
Detergent dispensers can often become breeding grounds for grime and buildup. To prevent this issue, it's crucial to remove and thoroughly rinse the detergent drawer regularly. This ensures proper dispensing of cleaning agents during each wash cycle. Start by pulling out the drawer and rinsing it under warm water, using an old toothbrush or small brush to scrub away any stubborn residue. Once clean, allow it to air dry before reinserting it into the machine.
Inspect and clean the door seal
The rubber gasket on your washing machine door plays a vital role in keeping water inside during cycles. However, debris, mould, or mildew can accumulate over time if not properly maintained. Regularly inspect the door seal and wipe it down with a damp cloth and mild detergent when necessary. This simple task can save you from potential leaks or unpleasant odours in your laundry room.
Maintain the filter
Your Bosch washing machine has a drain pump filter designed to catch lint, coins, and other small items that may find their way into your laundry loads. Keeping this filter clean is essential for preventing blockages and improving drainage efficiency within your appliance. Aim to remove and clean the drain pump filter monthly by following these steps:
- Turn off and unplug your washing machine.
- Locate the access panel for the drain pump filter (usually found at the bottom front corner of your appliance).
- Place a towel underneath to catch any excess water.
- Slowly unscrew the filter cap and pull out the filter.
- Rinse the filter under warm water, removing any debris or buildup.
- Reinsert the clean filter and screw the cap back on securely.
Freshen up with vinegar
Vinegar is a versatile household staple that can help eliminate odours and break down limescale buildup in your Bosch washing machine. To freshen up your appliance, simply run an empty hot water cycle with two cups of white vinegar. Pour the vinegar directly into the drum before starting the cycle. This natural cleaning solution will do wonders for keeping your washing machine smelling fresh and functioning at its best.
By following these steps, you're taking proactive measures to keep your Bosch washing machine clean and efficient. Regular maintenance not only extends the life of your appliance but also ensures that your clothes come out looking their best after every wash. So don't hesitate—give these tips a try today!
How to clean a Kenmore washing machine
Identifying Your Kenmore Model
First things first, it's essential to know what type of Kenmore washing machine you have. Is it a top-loading or front-loading model? This information is crucial because each type requires a slightly different cleaning approach. So, take a moment to check your appliance and determine its design before diving into the cleaning process.
Cleaning the detergent dispenser
No matter if you have a top-loader or front-loader, one thing remains constant: the detergent dispenser needs some attention. Over time, soap residue and grime can build up in this area, leading to less effective washes and potential damage. To keep your Kenmore running smoothly, remove the detergent dispenser and give it a thorough cleaning with warm water and mild detergent.
Top-Loading Machines: Tub Cleaning Cycle
For those with top-loading Kenmore washing machines, running a tub cleaning cycle is an excellent way to maintain cleanliness and efficiency. You can either use a commercial washing machine cleaner or create your own solution by mixing hot water, vinegar, and baking soda. This concoction will effectively remove dirt, grime, and odours from your appliance's interior.
Front-Loading Machines: Door Seal and Drum Maintenance
If you're working with a front-loading Kenmore machine instead, there are two key areas that need regular care: the door seal and the drum. The door seal is prone to mould and mildew growth due to trapped moisture; inspecting it regularly for signs of buildup is vital for maintaining good hygiene levels in your washer. Use a damp cloth with mild detergent to clean both the door seal and drum surfaces thoroughly.
Filter Maintenance for Optimal Performance
Regardless of whether you have a top-loading or front-loading model, filter maintenance plays an essential role in keeping your Kenmore washing machine functioning at its best. For top-loaders, locate the lint filter (usually found near the agitator), while front-loaders have a drain pump filter (typically located near the bottom of the unit). Follow the manufacturer's instructions for cleaning these filters to ensure efficient operation and prevent potential damage to your appliance.
Case Study: The Importance of Regular Maintenance
A friend of mine recently experienced a problem with her Kenmore washing machine. She noticed that it wasn't draining properly, and there was an unpleasant odour coming from the appliance. After some investigation, she discovered that both the detergent dispenser and lint filter were clogged with soap residue and debris. By taking the time to clean these components thoroughly, she was able to restore her washer's performance and eliminate those pesky odours.
Social Proof: What Others Are Saying
Many Kenmore washing machine owners have found success maintaining their appliances by following these simple cleaning steps. Online forums are filled with positive feedback from users who have seen significant improvements in their machines' performance after implementing regular maintenance routines. So, take it from them—keeping your Kenmore washer clean is essential for optimal results!
Statistics: The Impact of Proper Maintenance
Did you know that proper maintenance can extend your washing machine's lifespan by up to 30%? According to industry experts, regularly cleaning key components like detergent dispensers, filters, door seals, and drums can significantly reduce wear and tear on your appliance. In turn, this helps save money on costly repairs or replacements down the line.
How to clean a Frigidaire washing machine
Preparing for the cleaning process
Before diving into the cleaning process, it's essential to unplug your Frigidaire washing machine. This ensures your safety while working with water and electrical components. Next, gather all necessary cleaning supplies: white vinegar, baking soda, a soft cloth or sponge, and warm soapy water. Finally, make sure there's no laundry left in the drum—you'll want an empty washer to work with!
Cleaning the detergent dispenser
A clean detergent dispenser is crucial for optimal washing performance. To start this process, carefully detach the dispenser drawer from your Frigidaire washing machine. Soak it in warm, soapy water for about 15 minutes to loosen any buildup or residue. After soaking, use a soft brush (an old toothbrush works great) to gently scrub away any remaining dirt or grime.
Rinse the dispenser thoroughly under running water to ensure all soap and debris are removed. Once clean, let it air dry completely before reassembling it back into your washing machine. A clean detergent dispenser will help prevent clogs and improve overall efficiency.
Running a Cleaning Cycle
Now that you've prepped your washer and cleaned the detergent dispenser, it's time to run a cleaning cycle! Pour two cups of white vinegar directly into the drum of your Frigidaire washing machine. The vinegar acts as a natural cleaner that helps break down mineral deposits and remove odours.
Next, sprinkle half a cup of baking soda over the vinegar in the drum; this combination creates a powerful yet gentle cleaning solution ideal for tackling tough stains and grime inside your washer. Close the door securely and set your machine to run on its hottest water setting without any laundry inside.
Wiping down drums and seals
Once the cleaning cycle has finished its job, you'll need to wipe down both the drum's interior and door seals using a damp, soft cloth or sponge. This step ensures that any remaining residue or debris is removed, leaving your washing machine spotless and fresh.
Pay close attention to the door seals; these areas can often harbour mould and mildew if not cleaned regularly. Gently scrub away any visible buildup, ensuring you reach all crevices and folds in the seal.
After wiping down the drum and seals, leave your washer's door open for a few hours. This allows proper air circulation within the machine and helps it dry completely. An adequately dried washer is less likely to develop unpleasant odours or mould growth.
Case Study: The Power of Cleaning Your Frigidaire Washing Machine
One homeowner noticed their laundry wasn't coming out as clean as it used to, despite using high-quality detergent and fabric softener. They decided to give their Frigidaire washing machine a thorough cleaning following the steps outlined above unplugging the machine, gathering supplies, cleaning the detergent dispenser, running a vinegar and baking soda cycle, and then wiping down the drum and seals.
To their surprise, they discovered significant amounts of built-up grime in both the detergent dispenser drawer and around the door seals. After completing this deep cleaning process, they immediately noticed an improvement in their laundry's cleanliness—no more dingy whites or lingering odours!
This case study highlights how crucial regular maintenance is for keeping your Frigidaire washing machine running at peak performance. By incorporating these simple yet effective cleaning techniques into your routine every few months (or more frequently if needed), you'll enjoy fresher-smelling laundry while extending your washer's lifespan!
How to clean a Maytag washing machine
Getting to Know Maytag-Specific Features
To effectively clean your Maytag washing machine, it's essential to become familiar with the model and its unique components. Some features you may find include a self-cleaning cycle, specialised dispensers for detergent or fabric softener, and lint filters or drain pumps. By understanding these elements, you can ensure optimal cleaning results and maintain your washer's performance.
Making the Most of the Self-Cleaning Cycle
Many Maytag washers come equipped with a built-in cleaning feature called "Clean Washer" or "Affresh." This handy function uses hot water and a cleaning tablet to break down residue within the machine, helping to keep it in top working condition. To utilise this feature, simply follow the instructions provided by your specific model. Typically, you'll need to add an Affresh tablet (or another suitable cleaner) to the drum before starting the cycle. Running this self-cleaning process once every few months will help maintain your washer's efficiency.
Keeping dispensers and removable parts clean
It's crucial to regularly remove and clean various parts of your Maytag washing machine, such as detergent, fabric softener, and bleach dispensers. Over time, residue from these substances can build up in their respective compartments, leading to reduced effectiveness during wash cycles. To prevent this issue, take out each dispenser according to manufacturer instructions and give them a thorough scrubbing using warm water and mild soap. Don't forget about any lint filters or drain pumps that might be present in your model; keeping these components clean will also contribute towards efficient operation.
Dealing with Hard Water Problems
If you live in an area with hard water issues (high mineral content), it can cause deposits to accumulate within your washing machine over time. These deposits not only affect overall performance but can also shorten the lifespan of your appliance. To combat this problem, consider using a water softener or descaling agent specifically designed for washing machines. By adding the recommended amount to your wash cycle, you'll help prevent mineral buildup and maintain optimal cleaning results.
A clean Maytag washer equals better laundry results.
Ultimately, taking care of your Maytag washing machine involves understanding its unique features, utilising the self-cleaning cycle, keeping dispensers and removable parts clean, and addressing any hard water issues. By following these steps, you'll not only extend the life of your washer but also ensure that it continues to deliver top-notch cleaning performance.
How to clean a Toshiba washing machine
Cleaning your Toshiba washing machine is essential for maintaining its performance, longevity, and preventing unpleasant odours. Just like other brands, Toshiba machines require regular maintenance to keep them in tip-top shape. So, let's dive right into the process of cleaning a Toshiba washing machine.
First things first: unplug the machine before starting any cleaning procedures. Safety should always be a priority when dealing with electrical appliances. Next up, remove any laundry left inside the washer drum.
Got a front-loading machine? Check out the gasket—that rubber seal around the door opening. Dirt and grime love to hide there! Grab an old toothbrush or small scrub brush and give it a good scrubbing with warm soapy water. Rinse well afterwards.
Now let's tackle the detergent dispenser drawer. Pull it out completely and give it a thorough wash using warm water and mild detergent. Don't forget to clean the cavity where the drawer sits too!
For top-loading machines, focus on cleaning the agitator (the central column). Use a cloth or sponge soaked in warm soapy water to wipe down all surfaces thoroughly.
Time for some deep-cleaning action! Fill your washer with hot water (or set it to its hottest cycle) and add two cups of white vinegar. Allow this mixture to sit for at least 30 minutes before running a complete wash cycle without any clothes inside.
Once that's done, run another empty cycle, but this time use baking soda instead of vinegar—about half a cup should do the trick! This will help neutralise any lingering odours and remove residue from your machine's inner workings.
While you're waiting for those cycles to finish, grab a damp cloth and clean both the interior and exterior surfaces of your washing machine. Pay special attention to areas like control panels, buttons, dials, and door handles, as they tend to harbour germs.
Don't forget about those hoses at the back, either! Inspect them for any signs of wear or damage and replace them if necessary. A quick wipe-down with a damp cloth can also help remove dust and dirt buildup.
Finished with the deep cleaning? Great! Now let's talk prevention. To keep your Toshiba washing machine smelling fresh and working efficiently, try leaving the door open after each use to allow air circulation. This helps prevent mould and mildew growth.
Also, consider using less detergent in your washes. Excess soap can lead to residue buildup inside your machine, which in turn creates a breeding ground for bacteria. Stick to the recommended amount specified by your detergent manufacturer.
Finally, make it a habit to clean your washing machine at least once every three months (more often if you have hard water). This will ensure that you're always enjoying clean laundry without any unpleasant surprises!
Last Updated on 7 May 2023 by harry