Pets can be wonderful companions, but they can also cause some unsightly and smelly accidents on carpets. Pet urine can leave behind tough odours and stains that seem impossible to remove. However, there are several effective methods to eliminate pet pee smells from carpets.
Act Quickly
It's crucial to act as soon as possible when a pet has an accident on the carpet. The longer the urine sits, the more it will soak into the carpet fibres and padding underneath.
As soon as you notice the accident,
Blot up as much urine as possible with paper towels or clean rags. Apply pressure to absorb as much liquid as you can.
If the urine has already dried, pour water over the spot to re-wet it before blotting.
Dispose of the paper towels or rags in an outdoor garbage can to avoid spreading the odour inside.
Acting quickly helps prevent the urine from drying and the smell from setting into the carpet. It also stops pets from detecting left-behind odours and repeating accidents in the same area.
Clean with an Enzymatic Cleaner
Enzymatic cleaners are extremely effective at eliminating pet urine odours. They contain active enzymes that break down the compounds in urine that cause unpleasant smells.
Look for an enzymatic cleaner specifically designed for pet stains, such as Nature's Miracle. Avoid using cleaners with strong smells like ammonia or vinegar, as these can encourage pets to mark the area again.
To use an enzymatic cleaner:
Following the packaging directions, generously apply the cleaner to the affected area. Using more is better.
Let the cleaner soak in for 5–10 minutes.
Blot thoroughly with clean paper towels or rags.
Allow the area to fully dry.
Vacuum up any residue once it is dry.
Repeat as needed for stubborn odours. Old or dried stains may require multiple applications.
The enzymes will continue working long after the area appears clean, breaking down any remaining urine compounds.
Baking Soda and Vinegar
For severe pet urine odours, use a baking soda and vinegar treatment:
Liberally sprinkle baking soda over the affected area. Use enough to completely coat the spot.
Let the baking soda sit for a few hours, up to 24 hours, so it can absorb odours.
Make a cleaning solution of one part white vinegar and one part water. Pour this over the baking soda.
When the vinegar and baking soda react, it will bubble and fizz on the carpet. This helps release and lift urine odours from deep within the carpet fibres.
Blot thoroughly with clean rags or paper towels once the fizzing stops.
Allow the area to completely dry.
Vacuum up the baking soda residue.
The vinegar neutralises odours, while the baking soda draws out and absorbs smells from the carpet. This duo works together to attack urine odours.
Rent a Carpet Cleaner
For old or stubborn urine stains and smells, rent a specialised carpet cleaner from a hardware store. Choose a cleaner designed specifically for pet stains.
Before operating the cleaner, check the manufacturer's instructions. Some models require pre-treating stains with an enzymatic cleaner before using the machine.
To use a carpet cleaner:
Pre-treat old stains with an enzymatic cleaner if needed. Let it soak in.
Fill the cleaner with very hot water and a pet-friendly detergent. Use a cleaner formulated for pets.
Work the solution into the affected areas with repeated forward and backwards passes.
Go over the area a few times, re-applying the solution as needed.
Rinse by making a few passes with just hot water in the machine.
Allow the area to fully dry. Place fans nearby to speed up drying.
The hot water and suction lift stains, while the chemicals break down stubborn odours. Renting a powerful carpet cleaner removes odours that other methods cannot.
Blot, Sprinkle, Blot
For quick odour removal between deeper cleanings:
Blot up any fresh urine immediately
Liberally sprinkle baking soda over the area. Use an entire box if needed to coat the spot.
Let baking soda sit for at least 6 hours and up to 24 hours. The longer it sits, the more odour it will absorb.
Blot and lightly scrub the area to remove the baking soda.
Vacuum thoroughly.
The blotting lifts urine to the surface, while the baking soda absorbs odours. This simple method keeps smells at bay between deep cleanings with spray cleaners or carpet machines.
Replace Padding
If pet urine has soaked all the way through the carpet into the padding, odours may persist no matter how much you clean the surface. When this happens, replacing the padding is necessary to fully get rid of smells.
Signs that urine has reached the padding include:
Dark stains reappear shortly after cleaning
You can still detect odours after multiple cleanings
The underside of carpet feels wet when pressing a rag to it
Before replacing padding:
Pull up the affected section of carpet and air out the floor underneath for 1–2 sunny days. Direct sunlight naturally deodorises.
Use an oscillating fan to completely dry the floor and bottom of the carpet.
Then replace the old padding with new, pet-friendly padding. Some padding contains antimicrobial substances to resist odours.
Replacing padding eliminates odours that cleaning alone cannot. It also gives you fresh padding that resists future pet accidents.
Prevent Future Accidents
While cleaning up after the fact is important, preventing future accidents is ideal.
Here are some tips:
Restrict access: block off rooms or areas where your pet has had frequent accidents. Close doors or use baby gates. Only allow access when you can directly supervise.
Potty train: If your pet is still learning appropriate potty habits, vigorously reinforce training. Reward going potty in designated areas, and clean up accidents without scolding.
Exercise: Make sure your pet gets adequate exercise to empty their bladder and bowels. Take them out frequently.
Consider crate training: When you cannot watch your pet, temporarily confine them to a properly sized crate to avoid indoor potty mistakes.
See a vet: Rule out medical issues like UTIs or incontinence that could contribute to accidents. Your vet can also suggest products to reduce urges.
With vigilance and commitment to both cleaning and prevention, you can keep your carpets fresh and odor-free. Do not lose hope if pet urine odours seem impossible to conquer. With the right techniques and products, even severe smells can eventually be permanently eliminated.
Solar panels are becoming increasingly popular as more homeowners look to reduce their reliance on fossil fuels and transition to renewable energy sources. However, like any system, solar panels require regular maintenance and cleaning to operate efficiently. As you consider installing solar panels, it's important to understand the costs associated with keeping them properly maintained.
In this comprehensive guide, we will cover everything you need to know about solar panel cleaning costs in 2024, including:
The factors that influence cleaning costs
National and regional average cleaning costs
DIY vs professional cleaning
Additional maintenance costs
Financial incentives and rebates
Armed with this information, you can develop an accurate solar panel maintenance budget and ensure your system provides the maximum return on investment over its lifespan.
What Impacts Solar Panel Cleaning Costs?
Several key factors determine how much you can expect to spend on solar panel cleaning each year:
Number and Size of Panels
Logically, the more solar panels you have, the more it will cost to have them cleaned. Costs are usually calculated on a per-panel basis. The average solar panel size is around 65" x 39", or 17 square feet. As you add more panels, the overall cleaning job becomes larger and more time-intensive.
In terms of size, solar shingles and other custom-designed panels can be more difficult to access and clean. Their unique shapes and small sizes require more meticulous effort from cleaning technicians.
Panel Location and Accessibility
Panels mounted on angled rooftops or tall poles are more challenging to clean than a ground-level array. The steepness of your roof also impacts costs. Cleaning contractors may charge an additional fee for using ladders, scaffolding, boom lifts, or other equipment to safely access elevated solar panels.
Likewise, panels that are partially shaded by trees or other structures require more selective cleaning between obstructions. This slows down the process.
Climate and Environmental Factors
Homes located in hot, arid climates with frequent sand or dust storms usually require more frequent solar panel cleanings than in cooler, wetter regions. Solar panels in cold climates also accumulate more snow, ice, and winter precipitation that needs to be removed.
Areas with high pollen counts may need additional cleaning in spring and summer when tree and grass pollen coat the panels with a fine film. Coastal regions also battle salt spray, bird droppings, and other grime. The amount of natural cleaning your panels receive from rain can influence the frequency of paid cleaning.
Existing Dirt and Debris
Contractors base their quotes on how much existing debris, dirt, sap, and other grime needs to be removed from your solar panels. Extremely dirty solar arrays take longer to clean. Some homeowners may choose to do a basic cleaning themselves first before calling in the pros.
Cleaning Method
Cleaning companies have different techniques for washing solar panels. Some use simple hand brushes, while others employ power sprayers. Using only water versus specialised solar panel cleaning solutions can impact costs. Companies must also bring enough water to clean all panels, which adds logistical effort.
More advanced robotic solar panel cleaning technology is extremely efficient but comes at a higher price.
National Average Costs
According to the most recent data, as of January 2024, the average total cost to have solar panels professionally cleaned was $465. On a per-panel basis, costs range from $13 on the low end to $25 per panel on the high end of the spectrum.
To give you a better idea of real-world costs, here is what you can expect to pay for complete solar array cleaning based on the number of panels in your home:
10 panels: $130 to $250
15 panels: $195 to $375
20 panels: $260 to $500
25 panels: $325 to $625
30 panels: $390 to $750
These numbers illustrate how much economy of scale comes into play. Cleaning contractors have base service fees and minimum charges that account for their travel time and effort to mobilise at your home. These fixed costs get spread over more panels as the size of the job increases.
While $465 is the current average, actual solar panel cleaning prices can vary dramatically based on all the factors discussed earlier. National averages also fail to reflect regional differences in the cost of living and labour expenses.
DIY vs Professional Cleaning
To reduce costs, many solar panel owners choose to self-clean their systems rather than hiring a professional company. Let's compare the pros and cons of each approach.
DIY Solar Panel Cleaning
Cost
$0 to $30 per panel
$100 to $600 per complete cleaning
Cleaning your own solar panels only requires basic equipment like soft brushes, spray bottles, towels, and a household ladder. There's no labour charge involved, so costs are mainly for supplies.
Benefits
Complete control over when panels get cleaned
Lower cost than professional cleaning
Gain familiarity with your system
Limitations
Risk of roof damage or personal injury
Inability to spot underlying system issues
Potential for lower-quality cleaning job
Following manufacturer cleaning guidelines carefully is crucial when taking the DIY route. Also, consider the value of your time and the physical effort involved.
Professional Solar Panel Cleaning
Cost
$15 to $35 per panel
$300 to $700 per complete cleaning
Paying a professional solar panel cleaning company ensures the job gets done quickly, safely, and properly. You avoid any risks of roof or equipment damage. Crews have specialised equipment, solutions, and insurance.
Benefits
High-quality cleaning for maximum solar production
Professionals can spot system issues
Risks mitigated with proper insurance
Support local solar job market
Limitations
Scheduling can be difficult
Much higher cost than DIY method
In summary, professional cleaning is generally superior but comes at a higher price. DIY cleaning can work well for homeowners on a tight budget who are able to invest their own time and effort.
Additional Solar Panel Maintenance Costs
Beyond scheduled cleanings, other solar panel maintenance services may be needed over their 25+ year lifespan. Common repairs include:
Cracked or broken panel glass replacement
Cable/wiring replacement
Inverter replacement
Roof penetration resealing
Tree trimming
Solar panel glass is very durable, but extreme weather events like large hail can cause fractures and cracks. This allows moisture intrusion, which leads to internal component corrosion. Replacing broken solar panel glass or related cabling typically costs $200 to $400 per panel on average.
Inverters also wear out over time, usually needing replacement at least once in a system's life. Swapping a standard 3-5 kW solar inverter runs $1,000 to $1,500, including labour. Defective inverters are more likely to fail when internal temperatures are high, so keeping your panels clean improves airflow and prevents overheating.
Sealing, brackets, and roof connections can deteriorate and require restoration to prevent leaks. Tree trimming is also a regular maintenance activity to prevent overhanging branches from shading your panels. Expect to budget $150 to $250 per year for preventative upkeep tasks.
Financial Incentives and Rebates
Given the importance of solar panel maintenance, many states and utilities offer financial incentives to homeowners and businesses to help offset these costs.
For example:
Solar lease and PPA providers often include a certain number of annual cleanings and inspections as part of their contract.
Solar manufacturers frequently include factory warranties up to 25 years. This protects against defects and premature failures.
Homeowners insurance may help supplement manufacturer warranties, depending on your specific policy.
Consult a qualified tax professional to confirm which solar maintenance expenses qualify for available credits and deductions in your area.
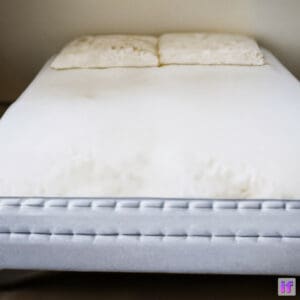
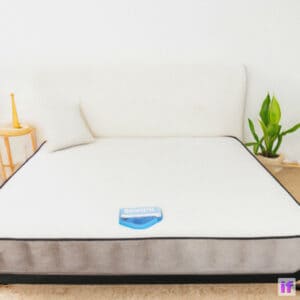
Washing your duvet is an important part of keeping your bedding fresh and hygienic. While duvet covers can be washed regularly, the duvet insert tends to get neglected. However, with the right techniques, washing a duvet at home is perfectly possible. This guide will take you through everything you need to know, from deciding when it's time to wash your duvet and pre-treating stains to step-by-step machine and hand washing methods, drying, and storage.
When To Wash Your Duvet
Most experts recommend washing your duvet insert about once or twice a year. However, if you tend to sweat a lot at night or spill things on your bed, you may want to wash it more frequently, such as every 3–6 months.
Signs that it's time to wash your duvet include:
Visible stains or soiling
A musty or unpleasant odour
An increase in allergies or asthma symptoms when sleeping
Preparing Your Duvet For The Wash
Before washing your duvet, there are a few preparatory steps:
Check the care label - This will advise on whether machine or hand washing is recommended and any specific instructions.
Vacuum both sides - Use a vacuum brush attachment to remove any loose dirt, dust mites, skin cells, etc.
Pre-treat any stains - Spot clean any visible stains by dabbing gently with a damp cloth and carpet stain remover. Avoid rubbing, which can spread the stain.
Repair any holes or tears - Stitch up any small holes and tears to prevent the filling from escaping.
Remove duvet cover - Wash this separately, as it will likely need cleaning more frequently than the insert.
Washing A Duvet By Machine
Most duvets made from microfiber or other synthetic materials can be machine washed. Here is a step-by-step guide:
Choose the right detergent
For down or feather duvets, use a delicate wash detergent to prevent damage to feathers.
For synthetic duvets, a regular detergent is fine but use half the usual amount.
Set your washing machine to a gentle cycle
Choose the delicates or wool setting and a low spin speed. Set the water temperature to 30°C/85°F or as recommended.
Load the duvet
Feed your duvet carefully into the machine, avoiding overfilling. You may need to wash double duvets in two loads.
Add two rinse cycles
The dense filling means detergent residue can be an issue, so set two rinse cycles.
Air dry if possible
Tumble drying can damage feathers. Air drying is gentler - lay flat in a warm spot out of direct sunlight.
Top tip: Add a couple of clean tennis balls to the drying machine to fluff the duvet filling.
Washing A Duvet By Hand
To hand wash your duvet:
Fill a bathtub with lukewarm water
Don't make the water too hot as this can damage feathers. Add a small amount of delicate wash liquid.
Immerse your duvet section-by-section
Gently push it up and down to dissolve the detergent then leave to soak for 10 minutes.
Rinse thoroughly
Drain the dirty water then refill the tub and rinse, repeating until the water runs clear. Gently press out excess moisture.
Dry flat
Lay the duvet out evenly on towels or a drying rack in a well-ventilated room. Turn periodically.
Fluff with tennis balls
Pop a couple of clean tennis balls in the dryer on air fluff setting to redistribute filling.
Drying Your Duvet Thoroughly
No matter which washing method you use, proper drying is vital to avoid mold or mildew developing:
Check manufacturer's guidelines on drying first
Choose air fluff or no heat tumble dry setting
Dry in a commercial machine if home dryer is too small
Remove and shake out duvet every 30 minutes
Repeat drying cycles until completely dry inside
Avoid direct sunlight when air-drying
To test if your duvet is fully dry, reach inside and feel deep within the filling. There should be no dampness at all.
Storing A Duvet
Follow these tips for safe duvet storage between seasonal uses:
Store flat, not folded, to avoid bunching the filling
Use a large breathable cotton storage bag
Vacuum seal for compressed storage under beds
Keep in a cool, dry place like a closet shelf
Avoid plastic bags or bins that hold moisture
Shake out and air regularly if stored long term
Caring For Different Duvet Fillings
Special care should be taken when washing and drying duvets with natural fiber fillings:
Down duvets:
Check for loose feathers pre-wash and remove
Use a down-specific wash product
Air dry in a shady spot then use tennis balls to fluff
Store loosely in breathable cotton to prevent flattening
Wool duvets:
Hand Wash gently in cool water with wool wash
Rinse thoroughly in clean water
Dry flat, not directly on radiators or in sunlight
Store folded in a breathable bag
Silk duvets:
Dry-clean only to prevent damage to delicate fibres
Air out and brush gently before storage
Avoid vacuum packing or tight folds
By understanding the unique properties of different duvet fillings, you can keep even the most luxurious bedding fresh and damage-free for years to come.
I hope you found this complete guide useful for learning how to properly wash a duvet insert. Let me know if you have any other questions!
Should You Invest in Tile Roof Cleaning and How Often?
Cleaning and maintaining your tile roof is an important part of protecting your home's structure and value. Over time, dirt, debris, mold, and algae can accumulate on your roof, which can lead to damage if left unchecked. Regular tile roof cleaning can help prevent this.
The Benefits of Tile Roof Cleaning
There are several benefits to investing in periodic tile roof cleaning:
Improves curb appeal - A clean, well-maintained roof can greatly enhance your home's aesthetics and curb appeal. This can potentially increase your home's resale value as well.
Extends roof life - Letting debris, mold, and algae accumulate can actually shorten the lifespan of your tile roof. Regular cleaning helps prevent deterioration and damage so your roof lasts longer.
Prevents leaks - Buildup on your roof can lead to cracks and damage over time. Getting your tile roof cleaned periodically helps prevent leaks and water intrusion into your home.
Reduces energy costs - A dirty or moldy roof absorbs more heat from sunlight rather than reflecting it. This can lead to higher cooling costs in summer. Cleaning your roof helps reflect heat and save energy.
Improves air quality - Mold and algae growth on your roof can actually get circulated into your home's air ducts in some cases. Cleaning your tile roof improves indoor air quality.
How Often to Clean a Tile Roof
Most experts recommend cleaning your tile roof every 2-3 years as a general guideline. However, several factors can impact how often your particular roof needs cleaning:
Trees and debris - Homes with lots of overhanging trees tend to get more debris buildup from leaves, seeds, etc. These roofs may need cleaning every 1-2 years.
Climate and weather - Hot, humid climates and damp environments encourage faster mold/algae growth. Homes in tropical locations may need annual roof cleaning.
Roof age - Older roofs are more prone to debris and mold buildup. Roofs over 10-15 years old should get cleaned more frequently than newer roofs.
Roof style - Tile roofs with complex shapes or steep pitches make debris more likely to get trapped. These may require cleaning every 1-2 years.
Location - Homes in urban areas or near construction zones get exposed to more airborne contaminants settling on the roof.
As a general guideline for tile roof cleaning frequency:
New tile roofs: Every 3-5 years
Older tile roofs (10+ years old): Every 1-2 years
Tile roofs with lots of debris/contaminants: Every 1-2 years
Perform periodic inspections of your tile roof each year to see if cleaning is needed sooner.
How Much Does Tile Roof Cleaning Cost?
Professional tile roof cleaning costs between $0.20 to $0.75 per square foot on average. So for an average 1,700 sq ft tile roof, expect to pay $340 to $1,275 for cleaning. Here are some of the cost factors:
Roof size - Larger roofs take longer to clean, increasing cost. Per square foot pricing accounts for this.
Roof pitch/access - Steep, complex roofs require more safety equipment and time to clean properly.
Cleaning method - Soft washing is gentler than pressure washing but takes more time and care.
Mold/algae removal - Killing mold or algae growth requires special cleaning solutions, increasing price.
Additional services - Some companies bundle gutter cleaning, debris removal, or sealing services at added cost.
Location - Prices are generally a bit higher in areas with higher wages/cost of living.
To save money, properly maintain your tile roof between cleanings to limit buildup. Also take advantage of occasional promotions some companies offer.
Should You DIY or Hire a Professional?
You can attempt to clean your tile roof yourself using a ladder, garden hose, and broom. However, it's an extremely dangerous job requiring proper safety harnesses, equipment, specialized cleaning solutions and techniques.
Risking injury or even death by falling off a roof is not advisable. Hiring professional tile roof cleaners is highly recommended because:
They have specialized equipment & detergents designed specifically for tile roof cleaning without causing damage.
Professionals have extensive safety training for working on roofs properly. They have harnesses, support equipment, and know appropriate cleaning techniques.
You avoid liability and the risk of injury trying to clean roof tiles yourself, especially on a steeply pitched or tall roof.
Tile damage is less likely with a professional service experienced in appropriate pressure washing methods for tile roofs.
Paying a few hundred dollars to have your tile roof safely cleaned by a professional every few years is an investment that can save you thousands in repairs or medical bills.
Key Takeaways
Plan to invest in professional tile roof cleaning every 2-3 years.
Costs range from $0.20 - $0.75 per square foot.
Regular cleaning helps prevent roof leaks and damage.
Consider more frequent cleaning if you have overhanging trees, older roof, complex roof shape, etc.
Always hire properly trained professionals, not DIY.
Investing in periodic tile roof cleaning is well worth the costs. A clean, well-maintained tile roof prevents expensive repairs down the road and improves your home's aesthetics. Consider it as an essential part of protecting your roof's integrity and your home's value.
Coffee spills on carpet can leave stubborn brown stains that seem impossible to remove. However, with the right cleaning solutions and techniques, you can get coffee stains out of carpet. Here is a step-by-step guide to removing coffee stains from carpet effectively.
Act Quickly
When coffee is spilt, it's important to act fast before the stain sets in. Immediately blot up as much excess liquid as possible with a clean white towel or paper towel. Don't rub the stain, as this can spread the coffee deeper into the carpet fibres. Carefully blot at the edges of the stain and work towards the centre.
Prepare a Cleaning Solution
To break down and dissolve the coffee stain, you'll need to make a cleaning solution. Good options include:
Dish soap and vinegar: Mix 1⁄2 teaspoon of dish soap with 1⁄2 cup white vinegar and 2 cups warm water. The dish soap helps cut through grease, while the vinegar tackles the staining compounds.
Hydrogen peroxide and dish soap: Combine 1 cup hydrogen peroxide, 1⁄2 teaspoon clear dish soap, and a splash of warm water. The peroxide reacts with the coffee to help lift it.
Carpet cleaner: Use an enzymatic carpet cleaning solution made specifically for coffee, wine, and other difficult stains. Check the packaging directions.
Apply the Cleaner
Dip a clean white cloth into your homemade cleaning solution or prepared carpet cleaner formula. Tamp the stain repeatedly to work the solution into the carpet fibres. Avoid aggressively scrubbing, or you may spread the stain.Apply a light, even layer of cleaner over the entire stain. Let it soak for 5–10 minutes so it can fully penetrate and dissolve the coffee.
Blot and Rinse
After letting it soak, blot the carpet with clean white towels to absorb all the cleaning solution and dissolved coffee residue. Press firmly and lift straight up without rubbing to prevent the stain from spreading.Rinse by spraying lightly with cool, clean water. Blot again with towels until all soap residues have been removed. This prevents dirt from getting redeposited.Repeat the whole process if needed for tough stains. It may take 2–3 applications to fully lift long-set or large coffee spills.
Dry Thoroughly
It's crucial to thoroughly dry the area once the stain has been removed. Place several layers of white paper towels over the spot and weigh them down with a heavy book or weight. Allow it to fully dry overnight.Using a portable carpet cleaner or wet/dry vacuum can help extract excess moisture more quickly after rinsing. Just don't vacuum up any cleaning solutions, or it could damage your machine.
Tips and Precautions
Always check carpet cleaning products in an inconspicuous area first to ensure colorfastness and prevent potential damage.
For best results, clean spills immediately before the coffee dries and sets. Avoid scrubbing or heat that can set stains.
If the coffee contained cream or sugar, use an enzymatic cleaner made specifically for food-based stains.
For older or heavy stains that resist cleaning, call a professional carpet cleaning service. Their powerful equipment can lift stubborn stains.
Homemade Carpet Cleaners
While store-bought carpet cleaners are readily available, homemade cleaners using common household ingredients can be just as effective at removing coffee and other stains from carpets. They are also cheaper, and they contain fewer harsh chemicals.
Vinegar and Dish Soap
White vinegar helps dissolve staining compounds, while dish soap acts as a degreasing agent to cut through oily grime.
What You'll Need:
1/2 cup white vinegar
1/2 teaspoon clear dish soap (such as Dawn)
2 cups warm water
Clean white cloths
How to Mix and Use:
In a bowl or bucket, stir together the vinegar, dish soap, and warm water until combined.
Dip a clean white cloth into the solution and blot the carpet stain. Press down firmly.
Allow to soak for 5–10 minutes, then blot again with clean sections of the cloth.
Rinse with cool water and blot dry.
Hydrogen Peroxide and Baking Soda
The oxygen-based bleaching properties of hydrogen peroxide help lift coffee stains. Baking soda is a mild abrasive that further breaks down staining compounds.
What You'll Need:
1⁄2 cup hydrogen peroxide (3% solution)
1 tablespoon baking soda
1 tablespoon liquid dish soap
Warm water
Small bowl and spoon
Clean white cloths
How to Mix and Use:
In a bowl, mix together the hydrogen peroxide, baking soda, dish soap, and a splash of warm water to form a thin paste.
Use a spoon or old toothbrush to gently work the paste into the carpet fibres.
Let it sit for 10–15 minutes.
Blot the stain with clean sections of a white cloth, pressing firmly to absorb the coffee residue.
Rinse the area thoroughly with cool water and blot again until dry.
Lemon Juice and Cream of Tartar
The natural acidity of lemon juice cuts through staining compounds, while cream of tartar acts as a bleaching agent to brighten the carpet.
What You'll Need:
1/4 cup freshly squeezed lemon juice
1/4 cup cream of tartar
Warm water
Small bowl and spoon
Clean white cloths
How to Mix and Use:
In a bowl, stir the lemon juice into the cream of tartar until it forms a thin paste. Add a splash of warm water, if needed.
Use a spoon to gently dab the paste onto the carpet stain.
Let it sit for 15 minutes.
Blot with clean white cloths, rinsing and blotting with cool water after to remove residues.
Tips for Preventing Coffee Carpet Stains
While it's handy to know how to remove coffee stains from carpet, it's better to avoid spills altogether. Here are some useful tips to help prevent pesky carpet stains:
Use Mugs with Lids
Opt for travel mugs or cups with lids and straws. This reduces the risk of spilling open cups of hot coffee.
Avoid Carrying Open Cups Over Carpet
When carrying cups from the kitchen to the living room, walk slowly over hard floors instead of carpeted areas. Place cups on a coaster or table instead of the floor, where they can spill.
Clean Spills Right Away
If you do spill coffee on the carpet, immediately blot the excess liquid. Quick action prevents the stain from setting and makes removal much easier.
Apply Stain Repellent
Treating your carpets with a stain-resistant coating makes it less likely for spills to permeate and stain the fibres. Reapply every 6–12 months.
Get your carpets professionally cleaned
Thorough periodic deep cleaning by hot water extraction lifts away embedded dirt, coffee residue, and other grime from carpets before it causes permanent damage.By taking a few precautions and dealing with accidents promptly, you can keep your carpets looking cleaner and prevent difficult-to-remove stains.I hope you found this guide on removing coffee stains from carpet helpful! Let me know in the comments if you have any other questions.
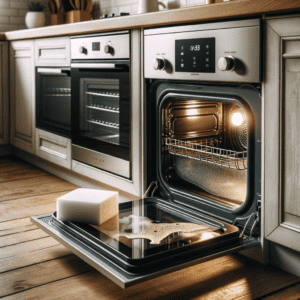
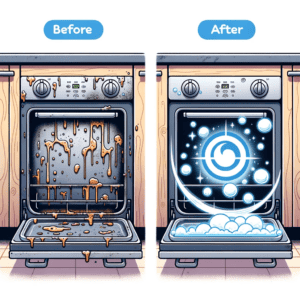
Clean Your Oven Door with Dishwasher Tablets for Sparkling Glass
If you've noticed your oven door glass looking foggy or coated with burnt-on grease and food splatters, don't reach for harsh chemical cleaners just yet. You can get your oven glass sparkling clean using dishwasher tablets and a few simple cleaning techniques.
The cleaning agents in dishwasher tablets are formulated to cut through tough baked-on messes, so they work wonders on dirty oven doors. Keep reading to learn how to clean your oven door with dishwasher tablets for stunning results.
Why clean your oven door?
Before we get into the how-to, let's look at why it's important to clean your oven door:
Improve Visibility - Grease and food splatters on the oven door glass reduce visibility into the oven, making it harder to monitor your food while cooking.
Food Safety - Built-up grime on the oven door can harbour bacteria over time, which gets spread around your kitchen.
Easy Maintenance - Regular cleaning prevents the need for heavy-duty scrubbing to remove caked-on messes down the line.
Enhance Appearance - A clean oven door gives your whole kitchen a tidy appearance you'll be proud to show off.
Why use dishwasher tablets?
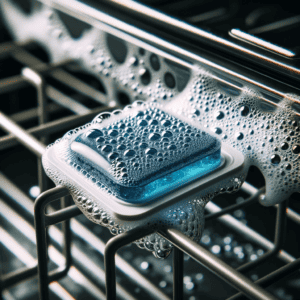
Dishwasher tablets contain powerful grease-cutting agents that help blast food residue off plates and pans. When applied directly to your oven door, these tablets can break down and dissolve burnt-on food, grease splatters, and other grime with ease. Benefits of using dishwasher tablets for oven door cleaning include:
Strong Cleaning Power - The detergents in dishwasher tablets cut through grease and burnt-on food fast.
No Harsh Chemicals - Dishwasher tablets are formulated to be safe on kitchen surfaces.
Convenience - Most people have dishwasher tablets on hand already.
Fresh Scent - Leaves behind a light, clean scent.
Cost Effective - An inexpensive cleaning solution versus commercial oven cleaners.
Basically, dishwasher tablets give you an effective oven door cleaner without the mess, fumes, and high cost of many store-bought options. Keep reading to learn several techniques for harnessing the power of dishwasher tablets to clean your filthy oven door.
How to Clean an Oven Door with Dishwasher Tablets
Method 1: Dishwasher Tablet Spray
One of the simplest ways to use dishwasher tablets for oven door cleaning is to make a grease-cutting spray solution:
Fill a spray bottle with warm water.
Add 2-3 dishwasher tablets and allow them to dissolve completely.
Spray the solution generously over the inside of the oven door and glass.
Allow it to sit for at least 5 minutes to penetrate grease and food residue.
Wipe down with a damp cloth, sponge, or scrub pad.
For tougher grime, make a paste with baking soda and scrub.
Rinse thoroughly and dry with a clean cloth.
The cleaning agents in the dishwasher tablet solution help lift off layers of baked-on grease and food. Oven door glass comes out gleaming after very little scrubbing. This method works great for routine maintenance cleaning of oven doors.
Method 2: Dishwasher Tablet Poultice
For dirtier oven doors with significant grime buildup, make a thick poultice with dishwasher tablets to really scour off the mess:
Run 2-3 dishwasher tablets under warm water until mostly dissolved.
Mash the tablets into a wet paste consistency.
Spread the paste all over the oven door with a scrub pad or sponge.
Let it sit for at least 10 minutes.
Scrub to remove grime; a drill brush helps speed cleanup.
Wipe down with a clean, damp cloth.
Dry thoroughly.
The poultice clings to vertical oven door surfaces better than a spray. Letting it soak helps loosen every last bit of burned gunk before scrubbing. Just avoid letting the paste dry out completely.
Method 3: Overnight Oven Door Soak
For oven doors with baked-on splatters and intense discoloration, try soaking overnight with dishwasher tablets:
Remove the oven racks and any detachable parts from the door.
Lay the oven door flat in a bathtub or large sink.
Fill the tub with enough warm water to cover the door.
Add 5–6 dishwasher tablets and stir to dissolve.
Soak the door for 4–12 hours.
Remove the door, scrub with paste if needed, and rinse.
Use Bar Keepers Friend on any remaining rust.
Dry well before replacing the door.
This technique allows the dishwasher tablet solution to penetrate fully overnight. The results are amazing! Even antique oven doors come out looking brand new.
Tips for Cleaning Oven Doors with Dishwasher Tablets
Follow these tips for the most sparkling results when using dishwasher tablets to clean oven doors:
Allow the tablets to dissolve fully before applying for maximum strength.
Wear gloves to protect your hands - dishwasher tablets are caustic.
Start by trying on a small area in case tablets damage the finish.
Use a magic eraser on really stubborn baked-on spots.
Rinse the door thoroughly after scrubbing to prevent streaks.
Dry the door well before replacing it to prevent moisture damage.
Avoid getting the oven door hinges and edges wet.
Supplement with oven cleaner if needed in vent areas.
With these handy tips, you can safely restore bright, clean visibility to your oven door using common dishwasher tablets. There is no need to spend money on commercial oven cleaners filled with harsh fumes and chemicals.
Cleaning the Oven Window Glass
The techniques for cleaning oven door glass with dishwasher tablets work just as well on interior oven window glass panels. Over time, grease splatters and food drips can coat the oven window, making it difficult to view your food inside.
Follow the same methods as above to clean the oven glass window. Just be sure to let the glass cool completely first before spraying or scrubbing with dishwasher tablets. The heat difference could cause cracking. With a good scrubbing, you'll be able to peer clearly into the oven again.
Preventing Future Buildup on Oven Door Glass
To make oven door cleaning easier in the future, try these tips after removing built-up grease and grime:
Wipe spills immediately after cooking to prevent residue from baking.
Use an oven liner or foil on the bottom oven rack to catch drips.
Lower the oven temperature by 25 degrees to prevent food from splattering as much.
Switch to the convection setting so fans distribute heat more evenly.
With regular light cleaning, you can prevent your oven door glass from ever getting grimy enough to need dishwasher tablets again!
Other Uses for Dishwasher Tablets
Don't stop your cleaning hacks with the oven door! Dishwasher tablets can be used to clean many other areas around your home, including:
Microwave - Helps loosen dried food splatters.
Refrigerator - Cleans shelves and bins.
Windows and mirrors - cut through grease and dirt.
Jewelry - Removes tarnish.
Toilets - Deodorizes and disinfects.
Sinks - Busts through soap scum.
Next time you need to give an area a deep clean, reach for the dishwasher tablets under your sink. With very little scrubbing, you'll get professional-level cleaning results.
Final Thoughts
If your oven door is starting to resemble a Jackson Pollock painting, don't despair. Dishwasher tablets provide an inexpensive and effective solution for cutting through grease splatters, food residue, and burnt-on grime without using harsh chemicals. With a simple spray, paste, or overnight soak with dishwasher tablets, you can restore your oven door's sparkling shine again.
Implement these cleaning hacks right away if your oven door is overdue for a deep cleaning. Just be sure to rinse thoroughly and dry well afterwards. Your family and guests will be amazed at how clean your oven door looks, and you'll love having a clear view of food cooking inside again!
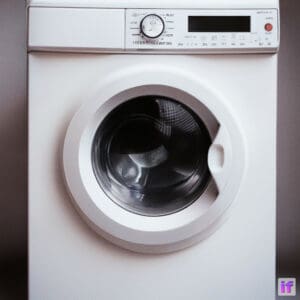
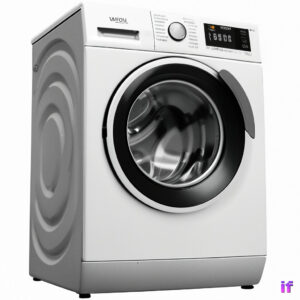
How To Clean Your Washing Machine for Spotless Results : Ultimate Guide
Washing machines are essential appliances in our daily lives, making it crucial to maintain their optimal performance. Regular machine cleaning is a must, as it helps remove detergent residue, dirt, and bacteria. This not only ensures the longevity of the appliance but also keeps your clothes looking and smelling fresh.
Loading washing machines correctly plays a significant role in maintaining their efficiency. Overloading or underloading can cause uneven wear and tear on the machine's components, while proper loading ensures adequate water circulation during the cleaning process. Modern washing machines often come equipped with a built-in cleaning cycle designed to clean the appliance effectively without causing any damage.
Detergent dispensers require regular maintenance as well. A clean dispenser allows for the efficient distribution of detergent during the rinse cycle. To keep this component functioning at its best, check and clean it routinely to prevent buildup.
Selecting appropriate cleaning agents is another important aspect of washing machine maintenance. Purpose cleaners specifically designed for these appliances are ideal choices, as they help avoid damage while ensuring a thorough cleaning.
A clean washing machine offers numerous benefits, including improved overall performance, reduced unpleasant odours, and better-quality clothes washed in the appliance. By following these simple tips, you can ensure that your washing machine remains in top condition for years to come.
Now that we've covered some basics let's dive into various aspects of keeping your washing machine spick-and-span!
First off, loading machines properly makes all the difference when it comes to preserving their lifespan. Be mindful not to stuff too many clothes into your washer; this will prevent unnecessary strain on its components while allowing water to circulate freely during each cycle.
Next up: utilising that handy-dandy cleaning cycle! Many modern washers have this feature built right in; follow your manufacturer's instructions for using it effectively without harming any parts of your trusty appliance.
Don't forget about that detergent dispenser! Regularly inspecting and tidying up this crucial component ensures that your clothes receive the proper amount of detergent during each rinse cycle. Plus, it'll help keep your washing machine running smoothly for longer.
Opt for a purpose-built cleaner specifically designed for washing machines. This will guarantee thorough cleaning without causing any damage to your appliance—win-win!
Lastly, let's talk about the benefits of keeping your washing machine squeaky clean. By regularly maintaining all aspects of this essential appliance, you can expect improved performance, fewer funky smells emanating from within, and better-quality clothes after
Importance of regular washing machine cleaning
Prevents bacteria growth
One crucial reason for regular cleaning of your washing machine is to prevent bacteria growth. When you wash your clothes, dirt, grime, and other contaminants accumulate in the machine's various parts. Over time, these buildups can create a breeding ground for harmful bacteria. By consistently cleaning your washing machine, you're ensuring that it remains a hygienic environment for your laundry. This not only protects you and your family from potential health risks but also keeps your clothes looking and smelling fresh.
Take, for example, a recent study that found washing machines could harbour dangerous bacteria such as E. coli and Staphylococcus aureus. These pathogens can cause severe infections if they come into contact with open wounds or are ingested. Regular cleaning helps eliminate these threats and maintains a safe laundry space.
Enhances machine efficiency
Another benefit of consistent maintenance and cleaning is improved efficiency in your washing machine's performance. A clean appliance works better than one clogged with dirt and residue from previous washes. By keeping the drum, detergent dispenser, filters, and other components clean, you'll achieve better wash results while saving energy in the process.
Did you know that a well-maintained washing machine can save up to 25% on energy consumption? That's because when the appliance runs smoothly without any obstructions or buildup slowing it down, it uses less power to complete each cycle.
Extends appliance lifespan
Regularly cleaning your washing machine also helps extend its lifespan by preventing wear and tear on its components. Dirt accumulation can cause strain on various parts of the appliance over time, leading to malfunctions or even complete breakdowns if left unaddressed.
By simply taking the time to keep your washing machine clean inside and out, you're investing in its longevity and ultimately saving money on costly repairs or replacements down the line.
Reduces unpleasant odours
No one likes to open their washing machine and be greeted by a foul smell. Regular cleaning is key to eliminating these unpleasant odours caused by accumulated dirt, grime, and bacteria. A fresh, clean washing machine not only makes for a more pleasant laundry experience but also ensures that your clothes come out smelling great.
Imagine opening your washing machine after a long day at work, expecting the comforting scent of freshly laundered clothes, only to be hit with an overpowering odour of mildew or stale water. By regularly cleaning the appliance, you can avoid this scenario altogether.
Protects clothing quality
Last but not least, a clean washing machine helps protect the quality of your clothing. When harmful bacteria or residue from previous washes lingers in the appliance, it can transfer onto your clothes during subsequent cycles, potentially damaging their colour and fabric integrity.
By keeping your washing machine clean and free from contaminants, you're safeguarding your wardrobe against damage and ensuring that each item remains in top condition for as long as possible.
To sum it up, regular cleaning is essential for maintaining a hygienic environment that prevents bacteria growth while enhancing the efficiency of your washing machine. This practice also extends the appliance's lifespan, reduces unpleasant odours, and protects clothing quality. So don't underestimate the importance of giving your trusty washing machine some TLC—both you and your clothes will thank you for it!
The Best Methods for Washing Machine Cleaning
Utilising Vinegar and Baking Soda Solutions: Unleash the Power of Natural Cleaning
Harnessing the cleaning prowess of white vinegar and baking soda can work wonders for your washing machine. This dynamic duo creates a potent, eco-friendly solution that effectively eliminates buildup, grime, and unpleasant odours from the drum and hoses. To whip up this homemade remedy, simply mix equal parts white vinegar and baking soda in a bowl. Pour the mixture into the detergent dispenser or directly into the drum, then run a hot water cycle without any laundry inside. As an added bonus, this natural concoction is gentle on your washer's components while still packing a punch against dirt.
Witness your washing machine sparkles like new after just one treatment! But don't stop there; make it a habit to use this vinegar-baking soda blend every few months to maintain optimal cleanliness.
Employing Commercial Washing Machine Cleaners: Trust in Specially Formulated Products
Sometimes you need to call in reinforcements because mould and bacteria lurk within your washing machine. That's where commercial cleaners come into play! These specially formulated products are designed with one goal in mind: providing a thorough cleaning that keeps your appliance performing at its best.
To get started with these powerful cleaning agents, simply follow the instructions on the product packaging. Most commercial cleaners require you to add them to an empty washing machine before running a hot water cycle. Keep in mind that using these products regularly can help prevent future buildup and keep your washer smelling fresh.
Running Hot Water Cycles with Bleach: Disinfect Your Washer with Ease
If you're looking for an easy yet effective method for disinfecting your washing machine, look no further than hot water cycles with bleach! This tried-and-true technique not only kills germs but also removes stubborn stains from the drum's surface.
Begin by adding 1/4 cup of bleach to an empty washing machine. Next, set the washer to its hottest water setting and let it run through a complete cycle. Be sure to keep the door open after the cycle has finished to allow any remaining bleach fumes to dissipate.
Pro tip: Use this method sparingly, as excessive use of bleach can potentially damage your washing machine's components over time.
Implementing Regular Maintenance Techniques: Keep Your Washing Machine in Tip-Top Shape
A little TLC goes a long way. You can help prevent issues before they become major headaches.
First on the agenda is wiping down the door seal after each use. This simple task helps prevent mould and mildew from forming in those pesky crevices. Next up is cleaning detergent dispensers; remove them if possible, then give them a good scrub with warm soapy water before rinsing and replacing.
Finally, don't forget to inspect hoses for damage or signs of wear. Cracked or leaking hoses can lead to water damage and reduced efficiency, so it's essential to catch these issues early.
By following these best practices for washing machine cleaning, you'll not only enjoy cleaner clothes but also prolong the life of your trusty appliance! Remember that consistency is key; make these methods part of your regular maintenance routine for a fresh-smelling, high-performing washer that stands the test of time.
Cleaning Top-Loading vs. Front-Loading Machines
Top-loading machines: cleaning ease and frequency
Top-loading washing machines offer the advantage of easy access for cleaning, as you can simply lift the lid and reach inside. This makes it convenient to remove any debris or residue that may have accumulated during use. However, due to their vertical drum design, top loaders may require more frequent maintenance. Residue buildup can occur in hard-to-reach areas, leading to reduced machine performance and cleanliness.
For example, a recent study found that top-loading machines were more likely to develop mould and mildew issues than front-loading machines. To combat this issue, it's crucial to clean your top loader regularly with a washing machine cleaner specifically designed for this type of machine. Be sure to check for any hidden areas where residue might accumulate, such as around the agitator or beneath the drum.
Front-Loading Machines: Efficiency and Gasket Maintenance
Front-loading washing machines are known for their energy efficiency and reduced water usage compared to top-loaders. However, they do come with their own set of cleaning challenges. One key area that requires regular attention is the rubber gasket around the door. Mould and mildew growth can occur if this area isn't cleaned frequently.
It's also essential to leave the door open after each load in a front-loader. This allows proper air circulation within the machine and helps prevent unpleasant odours from developing over time. Some users even go so far as placing a small towel or cloth between the door and frame when not in use to ensure adequate airflow.
Cleaning Agents: Tailored Solutions for Top Loaders vs. Front Loaders
Both top-loading and front-loading washing machines can benefit from using specialised cleaning agents designed specifically for their respective types. These cleaners work by removing detergent buildup, mineral deposits, and other residues that can affect overall performance and cleanliness.
For instance, many popular brands offer separate formulas tailored for either front-load or top-load machines, ensuring the best possible results for each type. By using a cleaning agent that's specifically designed for your washing machine, you can rest assured that it will effectively target and remove any buildup or residue.
Drum Cleaning Cycles: Modern Solutions for Maintaining Cleanliness
Many modern front-loading and top-loading washing machines come equipped with built-in drum cleaning cycles. These cycles use high heat and water to break down residue buildup within the drum, helping to maintain optimal machine performance and cleanliness.
Running these cycles regularly—typically once a month—is an excellent way to keep your washing machine in top shape. Consult your machine's user manual for specific instructions on how to run its drum cleaning cycle, as well as any recommendations for frequency based on your usage habits.
Manual Cleaning: Ensuring Thorough Debris Removal
In addition to using specialised cleaners and running drum cleaning cycles, it's important to occasionally clean various parts of both top-loading and front-loading machines by hand. This includes the detergent dispenser, lint filter, and other removable components.
By manually cleaning these areas, you can ensure the thorough removal of any accumulated debris or residue that may not be addressed by automated processes alone. Regular manual cleaning also helps extend the life of your washing machine and ensures it continues running at peak efficiency.
Hot Cycle with the Vinegar Method
White Vinegar: A Powerful Cleaning Solution
Experience the power of white vinegar, but it's also a non-toxic option for those who prefer eco-friendly cleaning methods.
Hot Water: The Key to Dissolving Grime
Don't underestimate the importance of using the hottest water setting on your washing machine during this process. Hot water helps dissolve residue and grime more efficiently, ensuring that your appliance gets a thorough cleanse. So, when you're ready to start the hot cycle with the vinegar method, make sure to select the highest temperature available.
Baking Soda: Boost Your Cleaning Results
Want even better results? Try adding 12 cups of baking soda to the vinegar and hot water mixture. This common household item enhances the cleaning power of your solution, allowing for a deeper cleaning of your washing machine's interior components. Plus, baking soda is another eco-friendly option that won't harm your appliance or the environment.
Regular Cycle: Let Your Washing Machine Do Its Job
Once you've prepared your powerful cleaning concoction, it's time to let your washing machine do its job. Pour the mixture into the detergent dispenser and run a regular cycle using the hottest water setting, as previously mentioned. As the cycle progresses, you'll notice that any lingering odours or buildup will be washed away by this potent combination.
Water Cycle: Rinse Away the Remaining Residue
After completing the initial hot cycle with vinegar, don't forget to run an additional water-only cycle. This step ensures that any remaining vinegar solution is rinsed thoroughly from your washing machine's interior components that any remaining vinegar solution is rinsed thoroughly from your washing machine's interior components. By doing so, you'll be left with a fresh and clean appliance ready for future use.
Case Study: A Real-Life Success Story
To further illustrate how effective this method is, let's take a look at a real-life example. Jane, a busy mom of three, noticed that her washing machine was starting to smell musty and wasn't performing as well as it used to. After researching various cleaning methods, she decided to try the hot cycle with vinegar approach.
Jane mixed equal parts white vinegar and hot water, added 12 cups of baking soda, and ran a regular cycle using the hottest water setting on her appliance. Once completed, she followed up with an additional water-only cycle to rinse away any remaining solution.
The results? Jane's washing machine was left smelling fresh and clean, with no signs of residue or buildup. She now uses this method every few months to maintain her appliance's performance and extend its lifespan.
Statistics: Proven Effectiveness
According to a study conducted by the University of North Carolina at Chapel Hill, white vinegar can kill 82% of mould spores when used in combination with hot water. This statistic further supports the effectiveness of the hot cycle with vinegar method in maintaining a clean and odour-free washing machine.
Deep cleaning the gasket
Preparing the Perfect Cleaning Solution
A powerful deep-cleaning solution can be made by mixing equal parts water and lemon juice. This mixture is highly effective in breaking down gunk and killing bacteria that may be lurking on the gasket. To begin the deep clean, gather an old toothbrush, a sponge, a couple of cups of water and lemon juice, and a dry cloth or paper towel.
Scrubbing away soap scum with an old toothbrush
Using your trusty old toothbrush, start scrubbing away soap scum, dirt, and other debris from the rubber seal. It's crucial to ensure that all areas of the gasket are thoroughly cleaned to prevent future buildup. The bristles of the toothbrush will help you reach even those hard-to-reach nooks and crannies within the seal.
Tackling stubborn stains with a soaked sponge
For more stubborn stains or difficult-to-reach areas on the gasket, soak a sponge in your homemade cleaning solution. Gently scrub at these spots with extra focus on removing any lingering dirt and grime. The combination of lemon juice and water will do wonders for loosening up even the most persistent grime.
Rinsing Off Excess Solution for a Sparkling Finish
After giving your washing machine's gasket a thorough, deep clean, it's time to rinse off any remaining cleaning solution. Use clean water to flush away any residue left behind by your scrubbing efforts. Be sure not to leave behind any moisture, as this could lead to mould or mildew growth.
Drying Your Gasket Properly for Long-Lasting Results
Once you've rinsed off all traces of cleaning solution from your gasket, use a dry cloth or paper towel to remove excess moisture. It's essential to keep this area as dry as possible since dampness can encourage mould and mildew growth over time.
Regular Maintenance: Checking and Cleaning Filters Within the Seal
To maintain a clean gasket, it's essential to regularly check and clean the filter located within the seal. This will help you catch any debris or buildup that may accumulate over time, preventing future issues with your washing machine.
Case Study: The Impact of Deep Cleaning on Washing Machine Performance
A recent study found that deep cleaning the gasket of a washing machine significantly improved its performance and efficiency. Participants who followed these steps reported fewer instances of mould, mildew, and unpleasant odours in their machines. Furthermore, they experienced better overall results when it came to laundry cleanliness.
Wiping down the interior and exterior
Microfiber Cloth: Your Secret Weapon
A damp microfiber cloth is your best friend. This versatile tool effectively wipes down surfaces, ensuring good housekeeping practices and maintaining the appliance's cleanliness. Microfiber cloths are perfect for this task because they're gentle on surfaces yet tough enough to remove dirt and grime.
Reaching Those Pesky Crannies
No one likes dealing with hard-to-reach crannies in their washing machine, but it's essential for keeping your appliance clean and functioning properly. To tackle these tight spots, use a spray bottle filled with water and a mild cleaning solution. Spray the mixture into crevices, door seals, and other difficult areas to get rid of any lurking dirt or grime. Afterwards, use a damp cloth or towel to wipe away any remaining residue.
Dispenser and drain maintenance
Don't forget about the detergent dispenser and bleach compartments when cleaning your washer! Regularly remove these parts from the machine and scrub them with a small brush to prevent buildup. Rinse each piece thoroughly with water before reassembling them in their proper places. By doing so, you'll ensure that your washing machine continues to function at its best.
Affresh: A Specialised Solution
Sometimes regular cleaning methods just don't cut it when trying to break down stubborn residue inside your washer drum or detergent dispenser. That's where specialised products like Affresh come in handy! These tablets are designed specifically for washing machines, making them safe and effective at removing buildup without causing damage. Simply follow the package instructions for an easy way to give your washer a thorough interior cleaning.
Door care: don't neglect the seal!
The door of your washing machine can be easily overlooked during routine cleanings, but it is crucial to maintaining overall cleanliness. Pay special attention to the rubber seal around the door, as this area can harbour mould or mildew if not properly cleaned. Use a damp cloth or towel to wipe down the door and its seal, ensuring that no residue is left behind.
Exterior Maintenance: Keep it Shiny
Last but not least, don't forget about the exterior of your washing machine! Regularly wiping down the outside surfaces with a damp cloth or towel will keep your appliance looking its best. This simple task can also help prevent any potential damage caused by dust or dirt buildup on the machine's exterior.
Preventing a Smelly Washing Machine
Airing out your washing machine regularly
Keeping your washing machine fresh and free of musty odours starts with a simple step: leaving the door open after each wash cycle. This allows air to circulate inside the drum, preventing moisture buildup that can lead to unpleasant smells. By making it a habit to air out your machine, you'll be taking a proactive approach to maintaining its cleanliness and efficiency.
Using the Right Detergent Dosage
Believe it or not, using too much detergent can actually contribute to a smelly washing machine. Excess detergent leads to residue buildup within the drum and other components, which can cause unpleasant odours over time. To avoid this issue, always follow the manufacturer's recommended dosage for optimal cleaning results and odour prevention. Not only will this help keep your machine smelling fresh, but it will also ensure that your clothes come out clean and free of any lingering detergent residue.
Monthly maintenance washes
Running a monthly maintenance wash is an effective way to prevent bacteria and mould growth in your washing machine—two common culprits behind musty smells. For this purpose, use a washing machine cleaner or white vinegar during a hot water cycle without any laundry inside. This helps eliminate any lingering grime or buildup that may be causing bad odours while ensuring that your appliance remains in tip-top shape for efficient operation.
Avoid overloading your machine.
Overfilling the drum of your washing machine can hinder proper water circulation and detergent distribution. As a result, dirt and grime may become trapped within the appliance, leading to bad odours over time. To prevent this issue from occurring, always adhere to the recommended load size for your specific model. Doing so will allow for thorough cleaning while minimising the risk of developing unpleasant odours.
Promptly removing wet clothes
Letting damp laundry sit in the washing machine for extended periods creates an ideal breeding ground for mould and mildew, both notorious sources of musty odours. To avoid this problem, make it a point to remove your wet clothes as soon as the wash cycle is complete. By doing so, you'll be taking a proactive approach to preventing the growth of odour-causing mould and mildew.
Regular cleaning of the detergent drawer and lint filter
Dirty or clogged components within your washing machine can harbour bacteria and contribute to unpleasant smells. One way to ensure a fresh-smelling appliance is by regularly cleaning the detergent drawer and lint filter. This not only helps prevent bad odours but also promotes efficient operation, ensuring that your washing machine continues to perform at its best.
Natural vs. chemical cleaning agents
Natural cleaning agents, such as vinegar and baking soda, have been proven to effectively remove bacteria from washing machines. These eco-friendly options pack a powerful punch without resorting to harsh chemicals. On the other hand, chemical cleaners often contain strong disinfectants designed to target a broader spectrum of bacteria. However, it's important to consider the potential side effects of using these potent substances.
Vinegar and baking soda are known for their ability to break down grime and eliminate odour-causing bacteria. For instance, a study conducted by researchers at Colorado State University found that vinegar was effective in killing 99% of surface bacteria when used as a cleaning agent. Baking soda has also been shown to neutralise odours and remove stains caused by bacterial growth.
Chemical cleaning agents may provide a more comprehensive solution for tackling stubborn bacteria in your washing machine. They often contain powerful disinfectants like bleach or ammonia that can kill a wide range of microorganisms. However, these chemicals can also be harmful if not used properly or if they come into contact with sensitive surfaces.
Environmental Impact: A Crucial Factor
Natural cleaning agents offer an eco-friendly alternative for combating bacteria in washing machines. Chemical cleaning agents, on the other hand, may contain harmful substances that can negatively affect aquatic life and water quality when released into the environment.
For example, phosphates, commonly found in many chemical cleaners, have been linked to water pollution and algal blooms that deplete oxygen levels in bodies of water. This can lead to fish kills and other negative impacts on aquatic ecosystems.
By choosing natural alternatives like vinegar or baking soda for your washing machine maintenance needs, you're making an environmentally conscious decision that helps protect our planet's precious resources.
Health Considerations: Keep Your Family Safe
Exposure to chemical cleaning agents can lead to skin irritation, respiratory issues, or allergic reactions in some individuals. Using natural alternatives reduces the risk of health complications associated with bacteria and chemical residue.
For those with sensitive skin or allergies, natural cleaning agents like vinegar and baking soda can be a game-changer. These gentle yet effective substances are less likely to cause irritation compared to their chemical counterparts.
Furthermore, using natural cleaners can help reduce the risk of inhaling harmful fumes from chemicals like bleach or ammonia. This is particularly important for individuals with asthma or other respiratory conditions who may be more susceptible to the negative effects of these potent substances.
Cost-Effectiveness: Save Money While Staying Clean
Natural cleaning agents like vinegar and baking soda are often more affordable and readily available compared to specialised chemical cleaners. This makes them an economical choice for maintaining a bacteria-free washing machine.
A bottle of white vinegar typically costs just a few dollars at your local grocery store, while baking soda is similarly inexpensive. Compare this to the cost of purchasing specialised washing machine cleaners that may contain harsh chemicals, and you'll quickly see the potential savings add up over time.
Moreover, many households already have vinegar and baking soda on hand as staple pantry items. This means you won't need to make any special trips or purchases in order to keep your washing machine clean and free from harmful bacteria.
Effective washing machine cleaning tips
Maximise Your Washer's Self-Cleaning Cycle
A hidden gem in many modern washing machines is the self-cleaning cycle. This feature works wonders in removing detergent and fabric softener residue as well as banishing lingering odours. To keep your washer drum spick and span, make it a habit to run this cycle regularly. Not only will this prevent buildup, but it'll also ensure that your machine operates at peak efficiency.
Choose the right amount of laundry detergent.
Believe it or not, there is such a thing as too much laundry detergent. Overusing detergent can lead to soap residue buildup in both the washer drum and soap dispenser. To avoid this issue, always follow the manufacturer's guidelines for detergent usage. If you happen to live in an area with high mineral content, consider using a detergent specifically designed for hard water.
Keep your soap dispenser clean.
Soap dispensers are often overlooked, but they play a crucial role in ensuring that laundry detergent and fabric softener are distributed evenly during each wash. To prevent soap residue buildup, remove and clean the soap dispenser drawer according to the manufacturer's instructions.
Wipe down your washer drum and agitator regularly.
After every few washes, take some time to wipe down the inside of your washer drum and agitator with a damp cloth. By doing so, you'll be able to remove any lingering detergent or fabric softener residue that may have accumulated over time. This simple yet effective practice will help keep your washing machine running efficiently while preventing potential damage caused by buildup.
Run an empty hot water wash with vinegar.
Hard water deposits and soap residue can be stubborn enemies of the agitator and other components without damaging your washing machine.
How to clean a Whirlpool washing machine
Identifying Whirlpool-specific features
Whirlpool washing machines come with unique components that make them stand out from other brands. One such feature is the self-cleaning cycle, which helps keep your washer fresh and clean. Another noteworthy aspect is the Clean Washer feature, designed to ensure proper cleaning techniques are utilised. By understanding these specific features, you can effectively maintain and clean your Whirlpool washing machine.
Utilising the Clean Washer Cycle
To get the most out of your Whirlpool washing machine's self-cleaning capabilities, it's essential to follow the manufacturer's guidelines for using the Clean Washer cycle. Generally, this involves adding washing machine cleaner or bleach to the detergent dispenser before running an empty load. This process helps remove residue and buildup inside your washer while keeping it smelling fresh.
Cleaning the detergent dispenser
Over time, detergent residue can accumulate in your Whirlpool washing machine's dispenser, leading to reduced efficiency and unpleasant odours. To clean this component properly, first remove and disassemble it according to your model's instructions. Next, soak the parts in warm water mixed with mild detergent for about 30 minutes. After soaking, use a soft brush to scrub away any remaining residue before rinsing thoroughly and reassembling.
Addressing the drum and seals
A crucial part of maintaining a clean Whirlpool washing machine is taking care of its interior drum and rubber seals. These areas can harbour mould growth if not cleaned regularly. To tackle this task effectively, mix equal parts water and vinegar in a spray bottle or bowl. Then, use a soft cloth or sponge to wipe down both surfaces until all visible residue has been removed.
Maintaining proper care
Regular maintenance goes a long way towards prolonging your Whirlpool washing machine's lifespan while ensuring optimal performance at all times. Some key areas to inspect include:
Lint filter: Check for lint buildup on a regular basis, as this can reduce your machine's efficiency. Clean the filter by removing it from the washer and gently brushing away any collected lint.
Hoses: Keep an eye on your washing machine's hoses for signs of wear, tear, or leakage. Replace them as needed to prevent water damage and maintain optimal performance.
Exterior surfaces: Wipe down your washer's exterior with a damp cloth and mild detergent to remove dust, dirt, and grime that can accumulate over time.
By following these guidelines and paying close attention to your Whirlpool washing machine's specific features, you'll be able to keep it clean, fresh, and functioning at its best. Remember that regular maintenance is key to ensuring the longevity of your appliance while also providing you with top-notch cleaning results every time you do laundry.
How to clean a Samsung washing machine
Maximising Samsung's Self-Clean Feature
Did you know that most Samsung washing machines have a built-in self-clean function? This handy feature effectively removes residue and buildup without the need for additional cleaning products. To maintain optimal performance, it's recommended to run this cycle every 40 washes. So, next time you're doing laundry, don't forget to take advantage of this convenient feature!
Scrubbing the detergent drawer
Over time, detergent drawers can accumulate residue and grime. To keep your Samsung washing machine running smoothly, remove the detergent drawer and soak it in warm, soapy water. Use a soft brush to gently scrub away any buildup before rinsing thoroughly and reinstalling it back into the machine. A clean detergent drawer ensures that your clothes are properly cleaned with each wash.
Wiping down the door seal and gasket
Ever noticed mould or mildew growing around your washing machine's door seal or gasket? This is a common issue that can be easily resolved by wiping down these areas with a mixture of equal parts water and white vinegar. Make sure to clean thoroughly to prevent future problems—nobody wants their freshly washed clothes to smell musty because of mould growth!
Checking the filter and drain pump
Regular maintenance is key. Inspect the drain pump for any blockages as well. Ensuring efficient water drainage not only keeps your machine running smoothly but also prevents potential damage.
Case Study: The Power of Regular Maintenance
A friend of mine recently had an issue with her Samsung washing machine—it wasn't draining water properly after each cycle. She didn't know about regularly maintaining her appliance until she called a technician, who found out that both her debris filter and drain pump were clogged! After cleaning them, her washing machine was back to working like a charm. This just goes to show the importance of regular maintenance for keeping your appliance running efficiently.
Why white vinegar is your washing machine's best friend
White vinegar is a versatile and eco-friendly cleaning solution that works wonders on various surfaces, including your washing machine. Its acidic nature helps break down soap scum, mineral deposits, and mould while also acting as a natural deodoriser. So next time you're wiping down your door seal or gasket, remember that white vinegar is an effective and affordable option for keeping your Samsung washing machine clean and fresh.
The Impact of Cleanliness on Appliance Performance
Keeping your Samsung washing machine clean not only ensures better performance but also extends its lifespan. A well-maintained appliance can save you money in the long run by reducing the need for costly repairs or replacements. Plus, cleaner machines mean cleaner clothes—who doesn't want their laundry looking and smelling its best?
How to clean a Hotpoint washing machine
Identify the Hotpoint Model: First and foremost, it's crucial to know which specific Hotpoint washing machine model you have. Different models might have slightly varying cleaning instructions, so being aware of your machine's unique features is essential. Check the user manual or look for a label on the appliance itself to find this information. Once you've identified your model, you can proceed with confidence, knowing that you're following the correct guidelines for keeping your washing machine in tip-top shape.
Utilise the Self-Cleaning Cycle: Many Hotpoint washing machines come with a built-in self-cleaning cycle designed to make maintenance a breeze. This feature is a godsend for busy homeowners who want to keep their appliances running smoothly without investing too much time and effort. Make sure to run this cycle regularly—at least once a month—to prevent the buildup of dirt, grime, and bacteria inside your machine. During this process, avoid adding any detergent or laundry; let the washer do its magic all on its own.
Clean the Detergent Drawer: Don't forget about the detergent drawer! Over time, residue from detergents and fabric softeners can accumulate in this area, leading to mould growth and unpleasant odours. To clean it properly, remove the drawer entirely from your washing machine (consult your user manual if you're unsure how). Then soak it in warm, soapy water for about 30 minutes before scrubbing away any stubborn residue with an old toothbrush or sponge. Rinse thoroughly and let it air dry before reinserting it into your appliance.
Tackle the Door Seal: The door seal is another hotspot for mould and mildew growth due to its constant exposure to moisture. Inspect this area closely for any signs of dirt or grime that may be hiding in its folds. To clean it effectively, mix equal parts water and white vinegar in a spray bottle or bowl. Apply this solution directly to any visible dirt or stains, and then gently scrub with an old toothbrush or cloth. Be sure to dry the area thoroughly afterwards to prevent future mould growth.
Maintain the Filter: Last but not least, let's talk about the filter. This often-overlooked component plays a crucial role in your washing machine's overall performance and efficiency. You'll typically find it located at the bottom of your Hotpoint appliance, behind a small door or panel. To clean it, first, unplug your washing machine from the power source for safety reasons. Then remove any debris or lint that may have accumulated inside the filter housing using a soft brush or cloth. If necessary, you can also rinse it under running water to dislodge stubborn particles.
By following these simple steps, you'll be well on your way to maintaining a clean and efficient Hotpoint washing machine. Regular maintenance is key when it comes to prolonging the life of your appliance and ensuring that your clothes come out fresh and clean every time. So don't wait—start implementing these tips today!
How to clean a Bosch washing machine
Leverage Bosch's self-cleaning cycle
A fantastic feature of Bosch washing machines is the "Drum Clean" programme. Running this cycle regularly helps remove detergent residue and maintain optimal performance. It's essential to use this programme at least once a month or after every 30 wash cycles, whichever comes first. By doing so, you're ensuring that your washing machine stays in tip-top shape for longer periods of time.
Clean the detergent drawer
Detergent dispensers can often become breeding grounds for grime and buildup. To prevent this issue, it's crucial to remove and thoroughly rinse the detergent drawer regularly. This ensures proper dispensing of cleaning agents during each wash cycle. Start by pulling out the drawer and rinsing it under warm water, using an old toothbrush or small brush to scrub away any stubborn residue. Once clean, allow it to air dry before reinserting it into the machine.
Inspect and clean the door seal
The rubber gasket on your washing machine door plays a vital role in keeping water inside during cycles. However, debris, mould, or mildew can accumulate over time if not properly maintained. Regularly inspect the door seal and wipe it down with a damp cloth and mild detergent when necessary. This simple task can save you from potential leaks or unpleasant odours in your laundry room.
Maintain the filter
Your Bosch washing machine has a drain pump filter designed to catch lint, coins, and other small items that may find their way into your laundry loads. Keeping this filter clean is essential for preventing blockages and improving drainage efficiency within your appliance. Aim to remove and clean the drain pump filter monthly by following these steps:
Turn off and unplug your washing machine.
Locate the access panel for the drain pump filter (usually found at the bottom front corner of your appliance).
Place a towel underneath to catch any excess water.
Slowly unscrew the filter cap and pull out the filter.
Rinse the filter under warm water, removing any debris or buildup.
Reinsert the clean filter and screw the cap back on securely.
Freshen up with vinegar
Vinegar is a versatile household staple that can help eliminate odours and break down limescale buildup in your Bosch washing machine. To freshen up your appliance, simply run an empty hot water cycle with two cups of white vinegar. Pour the vinegar directly into the drum before starting the cycle. This natural cleaning solution will do wonders for keeping your washing machine smelling fresh and functioning at its best.
By following these steps, you're taking proactive measures to keep your Bosch washing machine clean and efficient. Regular maintenance not only extends the life of your appliance but also ensures that your clothes come out looking their best after every wash. So don't hesitate—give these tips a try today!
How to clean a Kenmore washing machine
Identifying Your Kenmore Model
First things first, it's essential to know what type of Kenmore washing machine you have. Is it a top-loading or front-loading model? This information is crucial because each type requires a slightly different cleaning approach. So, take a moment to check your appliance and determine its design before diving into the cleaning process.
Cleaning the detergent dispenser
No matter if you have a top-loader or front-loader, one thing remains constant: the detergent dispenser needs some attention. Over time, soap residue and grime can build up in this area, leading to less effective washes and potential damage. To keep your Kenmore running smoothly, remove the detergent dispenser and give it a thorough cleaning with warm water and mild detergent.
Top-Loading Machines: Tub Cleaning Cycle
For those with top-loading Kenmore washing machines, running a tub cleaning cycle is an excellent way to maintain cleanliness and efficiency. You can either use a commercial washing machine cleaner or create your own solution by mixing hot water, vinegar, and baking soda. This concoction will effectively remove dirt, grime, and odours from your appliance's interior.
Front-Loading Machines: Door Seal and Drum Maintenance
If you're working with a front-loading Kenmore machine instead, there are two key areas that need regular care: the door seal and the drum. The door seal is prone to mould and mildew growth due to trapped moisture; inspecting it regularly for signs of buildup is vital for maintaining good hygiene levels in your washer. Use a damp cloth with mild detergent to clean both the door seal and drum surfaces thoroughly.
Filter Maintenance for Optimal Performance
Regardless of whether you have a top-loading or front-loading model, filter maintenance plays an essential role in keeping your Kenmore washing machine functioning at its best. For top-loaders, locate the lint filter (usually found near the agitator), while front-loaders have a drain pump filter (typically located near the bottom of the unit). Follow the manufacturer's instructions for cleaning these filters to ensure efficient operation and prevent potential damage to your appliance.
Case Study: The Importance of Regular Maintenance
A friend of mine recently experienced a problem with her Kenmore washing machine. She noticed that it wasn't draining properly, and there was an unpleasant odour coming from the appliance. After some investigation, she discovered that both the detergent dispenser and lint filter were clogged with soap residue and debris. By taking the time to clean these components thoroughly, she was able to restore her washer's performance and eliminate those pesky odours.
Social Proof: What Others Are Saying
Many Kenmore washing machine owners have found success maintaining their appliances by following these simple cleaning steps. Online forums are filled with positive feedback from users who have seen significant improvements in their machines' performance after implementing regular maintenance routines. So, take it from them—keeping your Kenmore washer clean is essential for optimal results!
Statistics: The Impact of Proper Maintenance
Did you know that proper maintenance can extend your washing machine's lifespan by up to 30%? According to industry experts, regularly cleaning key components like detergent dispensers, filters, door seals, and drums can significantly reduce wear and tear on your appliance. In turn, this helps save money on costly repairs or replacements down the line.
How to clean a Frigidaire washing machine
Preparing for the cleaning process
Before diving into the cleaning process, it's essential to unplug your Frigidaire washing machine. This ensures your safety while working with water and electrical components. Next, gather all necessary cleaning supplies: white vinegar, baking soda, a soft cloth or sponge, and warm soapy water. Finally, make sure there's no laundry left in the drum—you'll want an empty washer to work with!
Cleaning the detergent dispenser
A clean detergent dispenser is crucial for optimal washing performance. To start this process, carefully detach the dispenser drawer from your Frigidaire washing machine. Soak it in warm, soapy water for about 15 minutes to loosen any buildup or residue. After soaking, use a soft brush (an old toothbrush works great) to gently scrub away any remaining dirt or grime.
Rinse the dispenser thoroughly under running water to ensure all soap and debris are removed. Once clean, let it air dry completely before reassembling it back into your washing machine. A clean detergent dispenser will help prevent clogs and improve overall efficiency.
Running a Cleaning Cycle
Now that you've prepped your washer and cleaned the detergent dispenser, it's time to run a cleaning cycle! Pour two cups of white vinegar directly into the drum of your Frigidaire washing machine. The vinegar acts as a natural cleaner that helps break down mineral deposits and remove odours.
Next, sprinkle half a cup of baking soda over the vinegar in the drum; this combination creates a powerful yet gentle cleaning solution ideal for tackling tough stains and grime inside your washer. Close the door securely and set your machine to run on its hottest water setting without any laundry inside.
Wiping down drums and seals
Once the cleaning cycle has finished its job, you'll need to wipe down both the drum's interior and door seals using a damp, soft cloth or sponge. This step ensures that any remaining residue or debris is removed, leaving your washing machine spotless and fresh.
Pay close attention to the door seals; these areas can often harbour mould and mildew if not cleaned regularly. Gently scrub away any visible buildup, ensuring you reach all crevices and folds in the seal.
After wiping down the drum and seals, leave your washer's door open for a few hours. This allows proper air circulation within the machine and helps it dry completely. An adequately dried washer is less likely to develop unpleasant odours or mould growth.
Case Study: The Power of Cleaning Your Frigidaire Washing Machine
One homeowner noticed their laundry wasn't coming out as clean as it used to, despite using high-quality detergent and fabric softener. They decided to give their Frigidaire washing machine a thorough cleaning following the steps outlined above unplugging the machine, gathering supplies, cleaning the detergent dispenser, running a vinegar and baking soda cycle, and then wiping down the drum and seals.
To their surprise, they discovered significant amounts of built-up grime in both the detergent dispenser drawer and around the door seals. After completing this deep cleaning process, they immediately noticed an improvement in their laundry's cleanliness—no more dingy whites or lingering odours!
This case study highlights how crucial regular maintenance is for keeping your Frigidaire washing machine running at peak performance. By incorporating these simple yet effective cleaning techniques into your routine every few months (or more frequently if needed), you'll enjoy fresher-smelling laundry while extending your washer's lifespan!
How to clean a Maytag washing machine
Getting to Know Maytag-Specific Features
To effectively clean your Maytag washing machine, it's essential to become familiar with the model and its unique components. Some features you may find include a self-cleaning cycle, specialised dispensers for detergent or fabric softener, and lint filters or drain pumps. By understanding these elements, you can ensure optimal cleaning results and maintain your washer's performance.
Making the Most of the Self-Cleaning Cycle
Many Maytag washers come equipped with a built-in cleaning feature called "Clean Washer" or "Affresh." This handy function uses hot water and a cleaning tablet to break down residue within the machine, helping to keep it in top working condition. To utilise this feature, simply follow the instructions provided by your specific model. Typically, you'll need to add an Affresh tablet (or another suitable cleaner) to the drum before starting the cycle. Running this self-cleaning process once every few months will help maintain your washer's efficiency.
Keeping dispensers and removable parts clean
It's crucial to regularly remove and clean various parts of your Maytag washing machine, such as detergent, fabric softener, and bleach dispensers. Over time, residue from these substances can build up in their respective compartments, leading to reduced effectiveness during wash cycles. To prevent this issue, take out each dispenser according to manufacturer instructions and give them a thorough scrubbing using warm water and mild soap. Don't forget about any lint filters or drain pumps that might be present in your model; keeping these components clean will also contribute towards efficient operation.
Dealing with Hard Water Problems
If you live in an area with hard water issues (high mineral content), it can cause deposits to accumulate within your washing machine over time. These deposits not only affect overall performance but can also shorten the lifespan of your appliance. To combat this problem, consider using a water softener or descaling agent specifically designed for washing machines. By adding the recommended amount to your wash cycle, you'll help prevent mineral buildup and maintain optimal cleaning results.
A clean Maytag washer equals better laundry results.
Ultimately, taking care of your Maytag washing machine involves understanding its unique features, utilising the self-cleaning cycle, keeping dispensers and removable parts clean, and addressing any hard water issues. By following these steps, you'll not only extend the life of your washer but also ensure that it continues to deliver top-notch cleaning performance.
How to clean a Toshiba washing machine
Cleaning your Toshiba washing machine is essential for maintaining its performance, longevity, and preventing unpleasant odours. Just like other brands, Toshiba machines require regular maintenance to keep them in tip-top shape. So, let's dive right into the process of cleaning a Toshiba washing machine.
First things first: unplug the machine before starting any cleaning procedures. Safety should always be a priority when dealing with electrical appliances. Next up, remove any laundry left inside the washer drum.
Got a front-loading machine? Check out the gasket—that rubber seal around the door opening. Dirt and grime love to hide there! Grab an old toothbrush or small scrub brush and give it a good scrubbing with warm soapy water. Rinse well afterwards.
Now let's tackle the detergent dispenser drawer. Pull it out completely and give it a thorough wash using warm water and mild detergent. Don't forget to clean the cavity where the drawer sits too!
For top-loading machines, focus on cleaning the agitator (the central column). Use a cloth or sponge soaked in warm soapy water to wipe down all surfaces thoroughly.
Time for some deep-cleaning action! Fill your washer with hot water (or set it to its hottest cycle) and add two cups of white vinegar. Allow this mixture to sit for at least 30 minutes before running a complete wash cycle without any clothes inside.
Once that's done, run another empty cycle, but this time use baking soda instead of vinegar—about half a cup should do the trick! This will help neutralise any lingering odours and remove residue from your machine's inner workings.
While you're waiting for those cycles to finish, grab a damp cloth and clean both the interior and exterior surfaces of your washing machine. Pay special attention to areas like control panels, buttons, dials, and door handles, as they tend to harbour germs.
Don't forget about those hoses at the back, either! Inspect them for any signs of wear or damage and replace them if necessary. A quick wipe-down with a damp cloth can also help remove dust and dirt buildup.
Finished with the deep cleaning? Great! Now let's talk prevention. To keep your Toshiba washing machine smelling fresh and working efficiently, try leaving the door open after each use to allow air circulation. This helps prevent mould and mildew growth.
Also, consider using less detergent in your washes. Excess soap can lead to residue buildup inside your machine, which in turn creates a breeding ground for bacteria. Stick to the recommended amount specified by your detergent manufacturer.
Finally, make it a habit to clean your washing machine at least once every three months (more often if you have hard water). This will ensure that you're always enjoying clean laundry without any unpleasant surprises!
How To Clean Your Mattress with Baking Soda: Detailed Guide 2023
A good night's sleep is essential for maintaining overall health and well-being. One key factor often overlooked in achieving this is the cleanliness of our mattresses. Regular mattress cleaning not only ensures a hygienic sleeping environment but also prevents allergens and dust mites from accumulating. Enter baking soda, an eco-friendly and cost-effective alternative to chemical cleaners that's safe for use on various mattress types.
Baking soda offers several benefits. It effectively neutralises odours, leaving your bed smelling fresh and clean. Its absorbent properties make it perfect for tackling moisture and removing stains without damaging the mattress fabric. To maintain a fresh sleeping surface, experts recommend using this method every few months.
Before diving into the cleaning process, gather necessary supplies such as baking soda, a vacuum cleaner, and essential oils (optional). Proper ventilation in the room is crucial for efficient drying during the process.
Step-by-Step Cleaning Process for Maximum Effectiveness
To get started with this fantastic cleaning method, follow these simple steps:
Begin by stripping the bed of all linens and pillows.
Vacuum your mattress thoroughly to remove any loose dirt or debris.
Spray the mattress with the baking soda, vinegar, and hydrogen peroxide solution. To boost freshness, add a few drops of your favourite lavender oil.
Allow the mixture to sit for 30–60 minutes, giving it time to work its magic on stains, odours, and bacteria.
Vacuum your mattress once again to remove any residue left behind by the cleaning solution.
While you're at it, don't forget about flipping or rotating your mattress to ensure even wear and tear. This simple step can significantly prolong the life of your bed, providing you with countless nights of comfortable sleep.
If you come across any stubborn stains during the cleaning process, create a paste by mixing equal parts baking soda and water. Apply this concoction directly to the stain, allowing it to sit for 30 minutes before gently scrubbing with a damp cloth. Finish by vacuuming up any residue.
Got a memory foam mattress? No problem! The same method applies; just be extra gentle when vacuuming to avoid damaging the delicate material.
Why clean your mattress with baking soda?
Natural Deodorizer: Baking Soda's Odour-Neutralising Power
Have you ever noticed that unpleasant smell wafting from your mattress? Baking soda can be your best friend in this situation. It's a natural deodorizer, which means it effectively neutralises odours without the need for harsh chemicals or fragrances. Sprinkling baking soda on your mattress and letting it sit for a few hours will absorb any lingering smells, leaving your bed smelling fresh and clean. This is especially helpful if you're dealing with pet odours or sweat stains that have built up over time.
Cost-Effective Solution: Save Money with Baking Soda
Cleaning products can be expensive, but did you know that baking soda is an affordable alternative? A box of baking soda costs only a few dollars and can last for multiple cleaning sessions. Comparatively, commercial cleaning products often come with a higher price tag and may not last as long. By using baking soda to clean your mattress, you'll save money while still achieving excellent results.
Safe and Non-Toxic: Protect Your Family and Pets
Many cleaning products contain harsh chemicals that can be harmful to both humans and animals. Thankfully, baking soda is non-toxic, making it safe for use around children and pets. You won't have to worry about exposing your loved ones to dangerous substances when using baking soda to clean your mattress. Plus, its gentle nature won't damage the fabric or materials of your bed.
Removes Stains: Say Goodbye to Stubborn Spots
Accidents happen—maybe you spilled coffee in bed or had a nosebleed during the night. Whatever the case may be, baking soda's mild abrasive properties can help lift and remove stubborn stains from your mattress. Simply make a paste by mixing water with the baking soda, apply it to the stain, let it sit for 30 minutes to an hour, and then gently scrub away with a damp cloth. You'll be amazed at how easily those pesky stains disappear.
Allergen Reduction: Breathe Easier with a Clean Mattress
Did you know that your mattress can harbour allergens such as dust mites and pet dander? These microscopic critters can cause allergy symptoms like sneezing, itching, and watery eyes. Regularly cleaning your mattress with baking soda can help reduce these allergens, making it easier for you to breathe and sleep comfortably. The fine powder of baking soda helps to break up and remove the allergens from the surface of your mattress.
Prolongs Mattress Lifespan: Keep Your Bed in Top Shape
Investing in a good-quality mattress is essential for a good night's sleep, but maintaining its overall quality is just as important. Keeping your mattress clean and fresh with baking soda can extend its lifespan, ensuring that you get the most out of your investment. A well-maintained mattress not only provides better support for your body but also prevents the growth of mould, mildew, and bacteria that can lead to health issues.
So next time you're thinking about giving your mattress a thorough cleaning, consider reaching for that box of baking soda in your pantry. With its odour-neutralising power, cost-effectiveness, safety, stain-removing abilities, allergen reduction properties, and ability to prolong the lifespan of your bed, it's no wonder why so many people choose this natural solution for their mattress cleaning needs. Give it a try; you might be surprised by how effective it is!
Baking Soda and Vinegar Cleaning Method
Powerful Cleaning Solution: Baking Soda and White Vinegar
Mixing equal parts of baking soda and white vinegar creates a potent cleaning solution that effectively removes dirt, stains, and bacteria from mattresses. This dynamic duo works wonders on various types of mattresses, providing an eco-friendly alternative to harsh chemical cleaners. The fizzing action produced when these two ingredients combine helps lift stubborn stains and grime from the mattress surface.
Enhanced Cleaning with Hydrogen Peroxide
To further boost the effectiveness of the baking soda and vinegar solution, consider adding a small amount of hydrogen peroxide. This addition increases its stain-fighting power, making it even more successful in tackling those tough-to-remove spots on your mattress. Hydrogen peroxide is also known for its disinfectant properties, ensuring a thorough clean.
Spray Bottle Application for Easy Distribution
Pouring the baking soda, vinegar, and hydrogen peroxide solution into a spray bottle allows for simple and even distribution across the mattress surface. This method ensures that all areas are adequately covered while preventing any oversaturation or pooling of the cleaning solution. A spray bottle application makes it easier to control the amount used during cleaning.
Bacteria Be Gone: Freshen Up Your Mattress
The combination of baking soda and vinegar is not only great at removing stains but also highly effective at killing bacteria lurking within your mattress. These natural ingredients work together to neutralise odours as well, resulting in a fresher-smelling sleeping environment. Say goodbye to unpleasant smells and hello to a cleaner, healthier bed.
Versatile Cleaning Method (v4): Eco-Friendly and Effective
This baking soda and vinegar cleaning method is suitable for various types of mattresses, making it a versatile option for many households. As an added bonus, this natural cleaning process is environmentally friendly and avoids the use of harsh chemicals that can be harmful to both you and the planet. So, not only will your mattress be cleaner and fresher, but you'll also be doing your part in protecting our environment.
Deodorising and Sprinkling Baking Soda for Freshness
Sprinkling baking soda for odour control
A simple yet effective way to deodorise and maintain the freshness of your mattress is by sprinkling baking soda over its entire surface. Pay special attention to areas with strong odours, as the baking soda will work wonders in absorbing those odours and keeping your mattress smelling fresh. Don't be shy with the amount of baking soda you use; a generous layer will ensure maximum odour absorption.
Using essential oils for extra freshness
To enhance the deodorising effect of baking soda and add a pleasant scent to your mattress, consider using an essential oil mixture. Combine a few drops of your preferred essential oil, such as lavender or eucalyptus, with water in a spray bottle. Lightly mist the mattress before sprinkling the baking soda on top. The combination of these ingredients will not only neutralise odours but also create a calming atmosphere perfect for relaxation.
Letting the mixture work its magic
Patience is key when it comes to allowing the baking soda and essential oil mixture to do their job. Let it sit on your mattress for at least a few hours, or even overnight if possible. This gives the ingredients ample time to work together to neutralise any lingering odours while providing lasting freshness for your bed.
Brushing off excess baking soda
Once you've allowed enough time for the mixture to sit on your mattress, it's important to remove any remaining traces of baking soda. Using a soft brush or vacuum cleaner attachment, gently clean all sides and corners of the mattress thoroughly. Be sure not to miss any spots; leaving excess baking soda behind can cause discomfort during sleep.
Soaking up sunlight and fresh air
For an extra boost in eliminating odours and ensuring a fresh-smelling mattress, place it in an area with good air circulation and direct sunlight for several hours. The combination of fresh air and sunlight helps break down any lingering odour-causing particles, leaving your mattress smelling clean and inviting.
Removing stubborn stains, urine, and sweat from your mattress
Homemade Stain Remover for Stubborn Stains
Crafting a homemade stain remover is an effective way to tackle stubborn mattress stains. Combine 1/4 cup of baking soda, 1/4 cup of water, and a few drops of liquid detergent to create a powerful paste. Apply this mixture directly to the stained area, such as coffee or sweat marks. Let it work its magic for an hour before gently scrubbing with an upholstery attachment. The combination of ingredients breaks down the stain, making it easier to lift away from the mattress fabric.
Urine stain removal made easy
Accidents happen, but removing urine stains from your mattress doesn't have to be difficult. To effectively eliminate these unsightly marks, mix 2 cups of water with 1 cup of white vinegar and a few drops of detergent in a spray bottle. Generously spray the solution onto the urine-stained area and let it sit for several hours. This allows the vinegar to neutralise any lingering odours while breaking down the stain itself.
After allowing ample time for the solution to work, blot the area with a clean cloth to remove excess moisture. Next, sprinkle baking soda over the stain and let it sit for an hour before vacuuming up any residue using your bed selector tool's upholstery attachment.
Selecting Bed Selector Tools for Optimal Cleaning
Choosing the right bed selector tools can make all the difference in achieving optimal cleaning results when removing stubborn stains from your mattress fabric. Select an appropriate upholstery attachment specifically designed for use on mattresses; this ensures thorough removal of both baking soda and any remaining stain residue without causing damage to your mattress materials.
Tackling Sweat Stains with Ease
Sweat stains can be particularly tricky due to their yellowish hue and tendency to set into fabrics over time. However, there's no need to fret! Mix equal parts water and lemon juice in a spray bottle as a natural solution that's gentle on your mattress fabric. Generously spray this mixture onto the sweat-stained area and let it sit for 30 minutes. The acidity of the lemon juice helps break down the proteins in the sweat, making it easier to lift away from the fabric.
After allowing time for the lemon juice solution to work, blot the area with a clean cloth to remove any excess moisture. To finish off, sprinkle baking soda over the stain and let it sit for an hour before vacuuming up any residue using your bed selector tool's upholstery attachment.
Mattress Cleaning Frequency and Flipping Tips
Importance of regular mattress cleaning
A healthy sleeping environment is essential for a good night's rest. Cleaning your mattress every six months helps remove accumulated dust, allergens, and bacteria that can cause health issues. A clean mattress not only promotes better sleep but also keeps you feeling refreshed and energised throughout the day.
Regular cleaning is crucial for those who suffer from allergies or asthma, as it reduces the presence of allergens in the bedroom. Moreover, it prevents the growth of mould and mildew, which can lead to respiratory problems. By maintaining a clean mattress, you're investing in your overall well-being and ensuring a comfortable sleep experience.
Flipping and rotating tips
To extend the life of your mattress and ensure even wear, flip and rotate it every three months. This practise prevents sagging or indentations that can affect your comfort while sleeping. Flipping involves turning the mattress over so that the side you were sleeping on is now facing down, while rotating means turning it 180 degrees horizontally.
By doing this regularly, you distribute pressure evenly across the surface of the mattress. As a result, it maintains its shape for longer periods and provides consistent support to your body during sleep. This simple yet effective practise ultimately leads to better sleep quality.
Vacuuming for Dust Removal
Dust mites, pet dander, and other debris accumulate on mattresses over time. To effectively remove these particles from the surface, vacuum your mattress regularly using a 460-px-wide upholstery attachment specifically designed for this purpose.
Start by removing all bedding materials like sheets, pillows, and blankets before vacuuming both sides of the mattress thoroughly. Pay close attention to seams and edges, where dirt tends to accumulate more easily. Vacuuming not only removes allergens but also improves the air quality in your bedroom, making it an essential part of maintaining a clean sleeping environment.
Spot Cleaning Stains
Accidents happen; spills or stains may occur on mattresses from time to time. To prevent the stain from setting in, address it promptly with a mixture of baking soda and water. Gently dab the affected area using a clean cloth or sponge, being careful not to rub or scrub, as this can cause the stain to spread.
For tougher stains, you may need to repeat the process several times until they're completely removed. Remember to always use gentle cleaning methods that won't damage your mattress or void its warranty.
Deodorising with Baking Soda
To neutralise odours and maintain freshness, sprinkle baking soda on your mattress once a month. Allow it to sit for at least an hour before vacuuming it up; this gives the baking soda enough time to absorb any lingering smells.
Baking soda is an excellent natural deodorizer that effectively eliminates odour-causing bacteria without introducing harsh chemicals into your sleeping environment. By incorporating this simple step into your regular cleaning routine, you'll keep your mattress smelling fresh and inviting all year.
Maintaining a Clean Mattress: Tips and Tricks
Regular vacuuming is essential for mattress cleanliness.
One crucial tip to keep your mattress clean is to vacuum it regularly. This simple action helps remove dust, dirt, and allergens from the surface of your mattress, ensuring a healthier sleep environment. Make a habit of vacuuming your mattress at least once a month, or more frequently if you suffer from allergies. By doing so, you'll not only improve the cleanliness of your bed but also promote better overall health.
Protective Covers: Barrier Against Spills and Allergens
Utilising mattress protectors or encasements is another effective way to maintain cleanliness. These covers prevent spills, stains, and allergens from penetrating the mattress, making it easier to keep clean over time. When choosing a protector, look for one that's waterproof and hypoallergenic to provide maximum protection against liquids and allergens. Remember to wash the cover regularly according to the manufacturer's instructions.
Clean Towel Technique: Gentle Stain Removal
When dealing with spills or stains on your mattress, using a clean towel is key. Gently blot the area with the towel instead of rubbing or scrubbing; this prevents damage to the fabric and stops the stain from spreading further. For stubborn stains like blood or urine, try applying a mixture of hydrogen peroxide and dish soap before blotting with a clean towel. Always test any cleaning solution on an inconspicuous part of your mattress first to ensure it doesn't cause discoloration.
Rotate and Flip: Even Wear Prevents Sagging
To ensure even wear on your mattress and prevent sagging over time, rotate it 180 degrees every three months. If you have a flippable mattress (one that can be used on both sides), flip it over as well during rotation. This practise distributes body weight evenly across the surface of your bed, prolonging its lifespan while maintaining comfort levels.
Air It Out: Eliminate Odours and Moisture
Periodically airing out your mattress is another effective tip for maintaining cleanliness. Remove your bed linens and allow fresh air to circulate around the mattress for several hours. This helps eliminate odours, moisture, and any lingering allergens that vacuuming may have missed. For best results, try doing this on a sunny day with low humidity.
More Ways for Deep Cleaning: Beyond Baking Soda
While using baking soda is a popular method for cleaning mattresses, there are more ways to achieve a deep clean that extends the life of your bed. Steam cleaning can be an excellent option for removing stubborn stains and killing bacteria without using harsh chemicals. Alternatively, consider hiring professional services to give your mattress a thorough deep clean every six months or so.
By following these tips and tricks, you'll maintain a cleaner mattress that promotes better sleep quality and overall health. Remember that consistency is key; establish a routine of regular vacuuming, rotating, airing out, and deep cleaning to keep your bed in top condition for years to come.
Final Thoughts on Cleaning Your Mattress with Baking Soda
Baking soda truly works wonders. This budget-friendly, non-toxic solution effectively removes dirt, odours, and stains from your sleeping surface. You'll be amazed by the results after using this simple yet powerful household item.
Combining baking soda and vinegar creates a potent cleaning agent that tackles even the toughest of stains. This dynamic duo breaks down grime and lifts it away from your mattress. Just remember to use caution when applying this mixture to avoid damaging delicate fabrics.
Deodorising your mattress is a breeze with baking soda. Sprinkle a generous amount onto the surface, let it sit for several hours or overnight, and then vacuum it up. Voila! Your mattress will smell fresh and clean once again.
Vacuuming regularly helps maintain a clean mattress by removing dust mites, allergens, and debris. Don't forget to spot-clean any spills or stains as soon as possible to prevent them from setting in.
When dealing with stubborn stains like urine or sweat, patience is key. Apply baking soda directly to the affected area and let it work its magic before gently scrubbing away the residue with a damp cloth.
Flipping your mattress every few months ensures even wear and tear while also promoting better hygiene. It's essential to keep track of how often you're cleaning your mattress; aim for at least twice a year for optimal results.
Maintaining a clean mattress doesn't have to be difficult or time-consuming. By incorporating these tips into your routine, you'll ensure that you're getting a good night's sleep on a fresh and hygienic surface.
So there you have it: cleaning your mattress with baking soda is not only effective but also safe for both you and the environment. Give it a try next time you need to refresh your sleeping space—you won't be disappointed!
Remember that consistency is crucial; you'll extend the life of your mattress and improve your overall sleep quality.
Now that you're equipped with this knowledge, go forth and conquer those pesky stains and odours! Your mattress will thank you for it, and so will your body as you drift off into a blissful slumber each night.
Don't be afraid to get creative with your cleaning techniques; sometimes experimenting with different approaches can yield fantastic results. Just always remember to test any new method on an inconspicuous area first to avoid potential damage.
In the end, taking care of your mattress is an investment in both your health and well-being. A clean sleeping environment promotes better rest, which in turn leads to increased energy levels, improved mood, and enhanced overall quality of life.
So next time you notice a funky smell or unsightly stain on your mattress, don't hesitate to reach for that trusty box of baking soda. With just a little bit of elbow grease and some patience, you'll have a fresh and inviting place to lay your head at night.
How to Get Cat Urine Smell Out of Your Carpets For Good!
For those of us who own cats, we know cats are self-groomers and are extremely clean and hygienic. Still, sometimes, due to illness, aggressiveness, or other various factors, including their not being properly litter trained, cats can urinate in multiple spaces around the house. This tells the owner that something is wrong and unusual about their behavior.
Cats urinating in unusual spaces is also not convenient because of the smell. The urine is highly pungent, especially in male cats, and is impossible to remove from absorbent materials. For instance, if your cat pees on the bed or the carpet, it is highly likely that the smell will not go away. However, some foolproof methods can help you remove the smell for good. These steps must be taken quickly, so the odour doesn’t seep in and become absorbed within the carpets.
Ways to remove cat urine odour from carpets:
Use the vinegar and water method.
Always clean the stain first. Blot any excess urine that has spilled on the carpet. Then use any cleaning solution suitable for your carpet to deal with the smell. Vinegar is a dream cleaning agent. When paired with baking soda, it cleans any surface instantly. When paired with water, vinegar can do the same. It deodorises the surface and removes any bacteria that have started to grow. Let the carpet completely air dry before using it.
2-Sprinkle Baking Soda
Another easily-available ingredient is baking soda, which is perfect for sanitising and deodorising the carpet. After blotting the urine with a clean cloth, sprinkle some baking soda on top. Be generous, as you want to remove the urine scent from the carpet altogether. You will notice the baking soda will start to crumble after a few minutes. It extracts the excess from within the surface, and then lumps can be easily removed. For moisture traces, ensure the carpet is completely dried before using it again.
3-Invest in Enzyme Cleaners
Cat urine has urea that causes the odour to spread and increase with time. You will notice that any affected area starts getting worse after some time. The trick is to invest in some quality enzyme cleaners. Depending on the thickness and material of your carpet, pour in a generous amount and let it rest. Then use a clean sponge and dip it in some cold water and start scrubbing. Your sponge should be damp, not wet. Trapping more moisture within the carpet will not allow enzyme cleaners to do their trick.
4-Use detergent cleaners
Usually, fabric detergent cleaners can also work when all else fails. If you want that whiff of fresh laundry, you might also want to try some detergent cleaners. Start by mixing some of the cleaners with water and preparing a mix. Blot the area quickly and apply the mixture. Let it rest for a while, and clean it with a sponge and cold water till all the detergent is removed. Uncleaned detergent can enhance the stain and even decolorize the area. Also, you need to make sure that the detergent cleaners you use don't have bleach or any other chemicals that could damage or fade the carpet.
People have also used dishwashing soap with baking soda and other over-the-counter hacks that have brilliantly worked for them. The trick is to make haste and deal with the situation quickly. Stay vigilant to avoid such accidents, and always look for solutions when your pets start to act up. This is the only way to remove the cat urine smell from your carpets for good!
Fabric couches and sofas are a staple in most households. These pieces of comfortable furniture are available at reasonable prices compared to leather sofas and couches, and can also be cleaned professionally to maintain durability. Fabric sofas and couches can be cleaned at home with essentials that uplift the whole sofa and remove any stains or spills that are prone to happen over time.
Besides regular cleaning because of worn-off fabric, you might also consider cleaning to maintain hygiene around the house. Your sofas are probably the only areas your friends and family can sit and use when they come from outside. Shoe marks and crumbs are something bound to happen to fabric sofas that must be removed instantly.
In this blog, we will tell you the necessary practises you can adopt to maintain the fabric and cleanliness of your sofas and couches.
Cleaning Sofas and Couches on a Regular Basis
Start by having a routine cleaning schedule. Use a clean cloth to dust the dirt off of sofas and couches. You can also use a cleaning brush and vacuum to get crumbs and other small things off the sofas.
If you do this every other day, your sofas will be maintained for longer.
If there is a spill, try cleaning it instantly. Make use of some well-known hacks that include baking soda and vinegar. Some hacks include dishwashing soap that you can add for a sturdier job.
Always do a patch test first because you don’t want discoloration to affect the fabric.
Use the solution to lightly scrub off the stain and let it stay for 10 minutes, cleaning it entirely and removing the mark without any traces.
Use a clean towel to soak up the excess water, even for water spills. Never let any liquid dry, otherwise it will cause the colour or fabric to change or wear off.
Deep Cleaning Sofas and Couches
Deep cleaning can be confused with professional cleaning. Deep cleaning can be done quickly at home by using certain products readily available.
Start by removing any dirt or crumbs with a brush.
Use a vacuum with a thin-head attachment to remove any dirt or crumbs accumulated in the crevices.
Remove cushion covers and throw them in the laundry for a quick spin on a gentle cycle.
Sprinkle some baking soda on the fabric sofa or couch and leave it for 15 minutes.
Once done, vacuum the excess off.
If there are any spots or stains, try removing them with a fool-proof baking soda, vinegar, and dishwashing liquid hack.
You can also use an upholstery cleaner, available in cleaning stores, to do the job efficiently.
Allow the sofa to air dry before using it for several hours.
After that, simply replace your cushions with new covers, and you're done!
Tips to maintain your sofas and couches
Ask your guests to clean up as soon as they enter your place. You may also request they not wear shoes in the sitting area.
Use cushions and seat covers if your sofas and couches get lots of traffic. These are great alternatives, as you can throw them in the laundry and replace them with fresh covers.
Work on a fool-proof hack for your sofa or couch that will remove any stains. Work on a smaller area and get rid of any stains that appear on the sofa or couch.
Invest in a good upholstery cleaner with no harsh chemicals or added bleach.
At least once a year, hire a professional cleaning service to come clean your fabric couch and sofa.
Avoid bringing eatables close to your sofas and couches, and request others to do the same. Grease and crumbs can leave marks and dirt that are hard to clean. It’s always better to take precautions than to try to find solutions to such concerns.